I am showing my instruments at Marylhurst University on April 28th and 29th from 12-5 on both days. If you are in the Portland area, come by and say hi. There will be a lot of luthiers showing their work.

I am showing my instruments at Marylhurst University on April 28th and 29th from 12-5 on both days. If you are in the Portland area, come by and say hi. There will be a lot of luthiers showing their work.
Almost done with another Baroque Lute. This one has a back made of Yew and a European Spruce top. I am planning on stringing it with Nylgut and real gut strings, stay tuned for the final piece.


Got the Stradivari Baroque Guitar all finished! Strung it up with Aquila Nylgut strings. It has a long scale at 74 cm. I will post a video soon to show how it sounds.
Here is the latest progress on the Sabionari guitar that I am building. Lots of details! This is the first one I have made from this plan, so I am modifying a few things as I make them.


New project! Getting close to completion on a copy of the Stradivari Sabionari Baroque Guitar. I created my own plan of the instrument based on measurements, thicknesses and photos of the original. Can’t wait to listen to the finished product! Still have a ways to go. The final details are so crucial and time consuming. I will keep you updated on the progress.
Just finished this lute for a friend. I mixed the styles of a seven course and a six course together to create a sort of hybrid style. Yew back, European spruce belly, holly, cocobolo and figured cherry for the veneers and fingerboard. bridge is plum with ebony veneer.


 Here is a sound sample of the 13 course baroque lute.


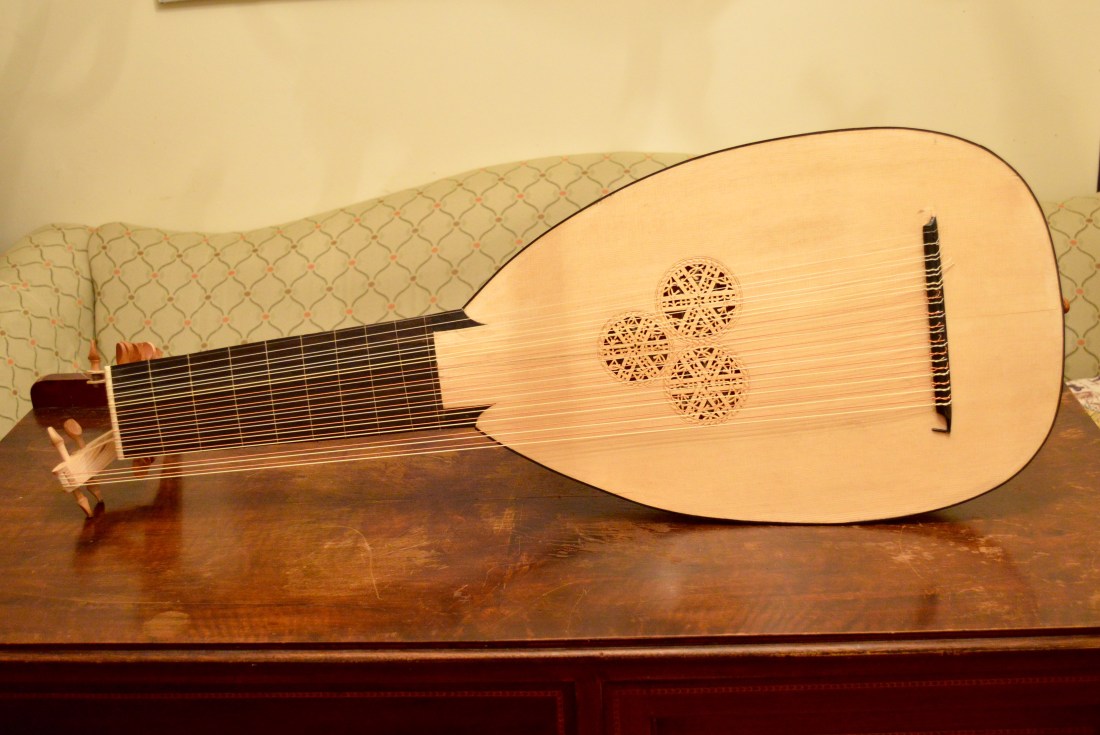
Finished the Baroque lute I started last year. It was actually done around Mother’s day, it was a busy summer! I learned a lot, and have started on another Baroque lute using the same mold with different woods. Stay tuned for pictures of the next one!
Finishing up the instrument at this point. Holly and ebony wood for the stripes on the neck. Tape on the neck to protect it from varnish.
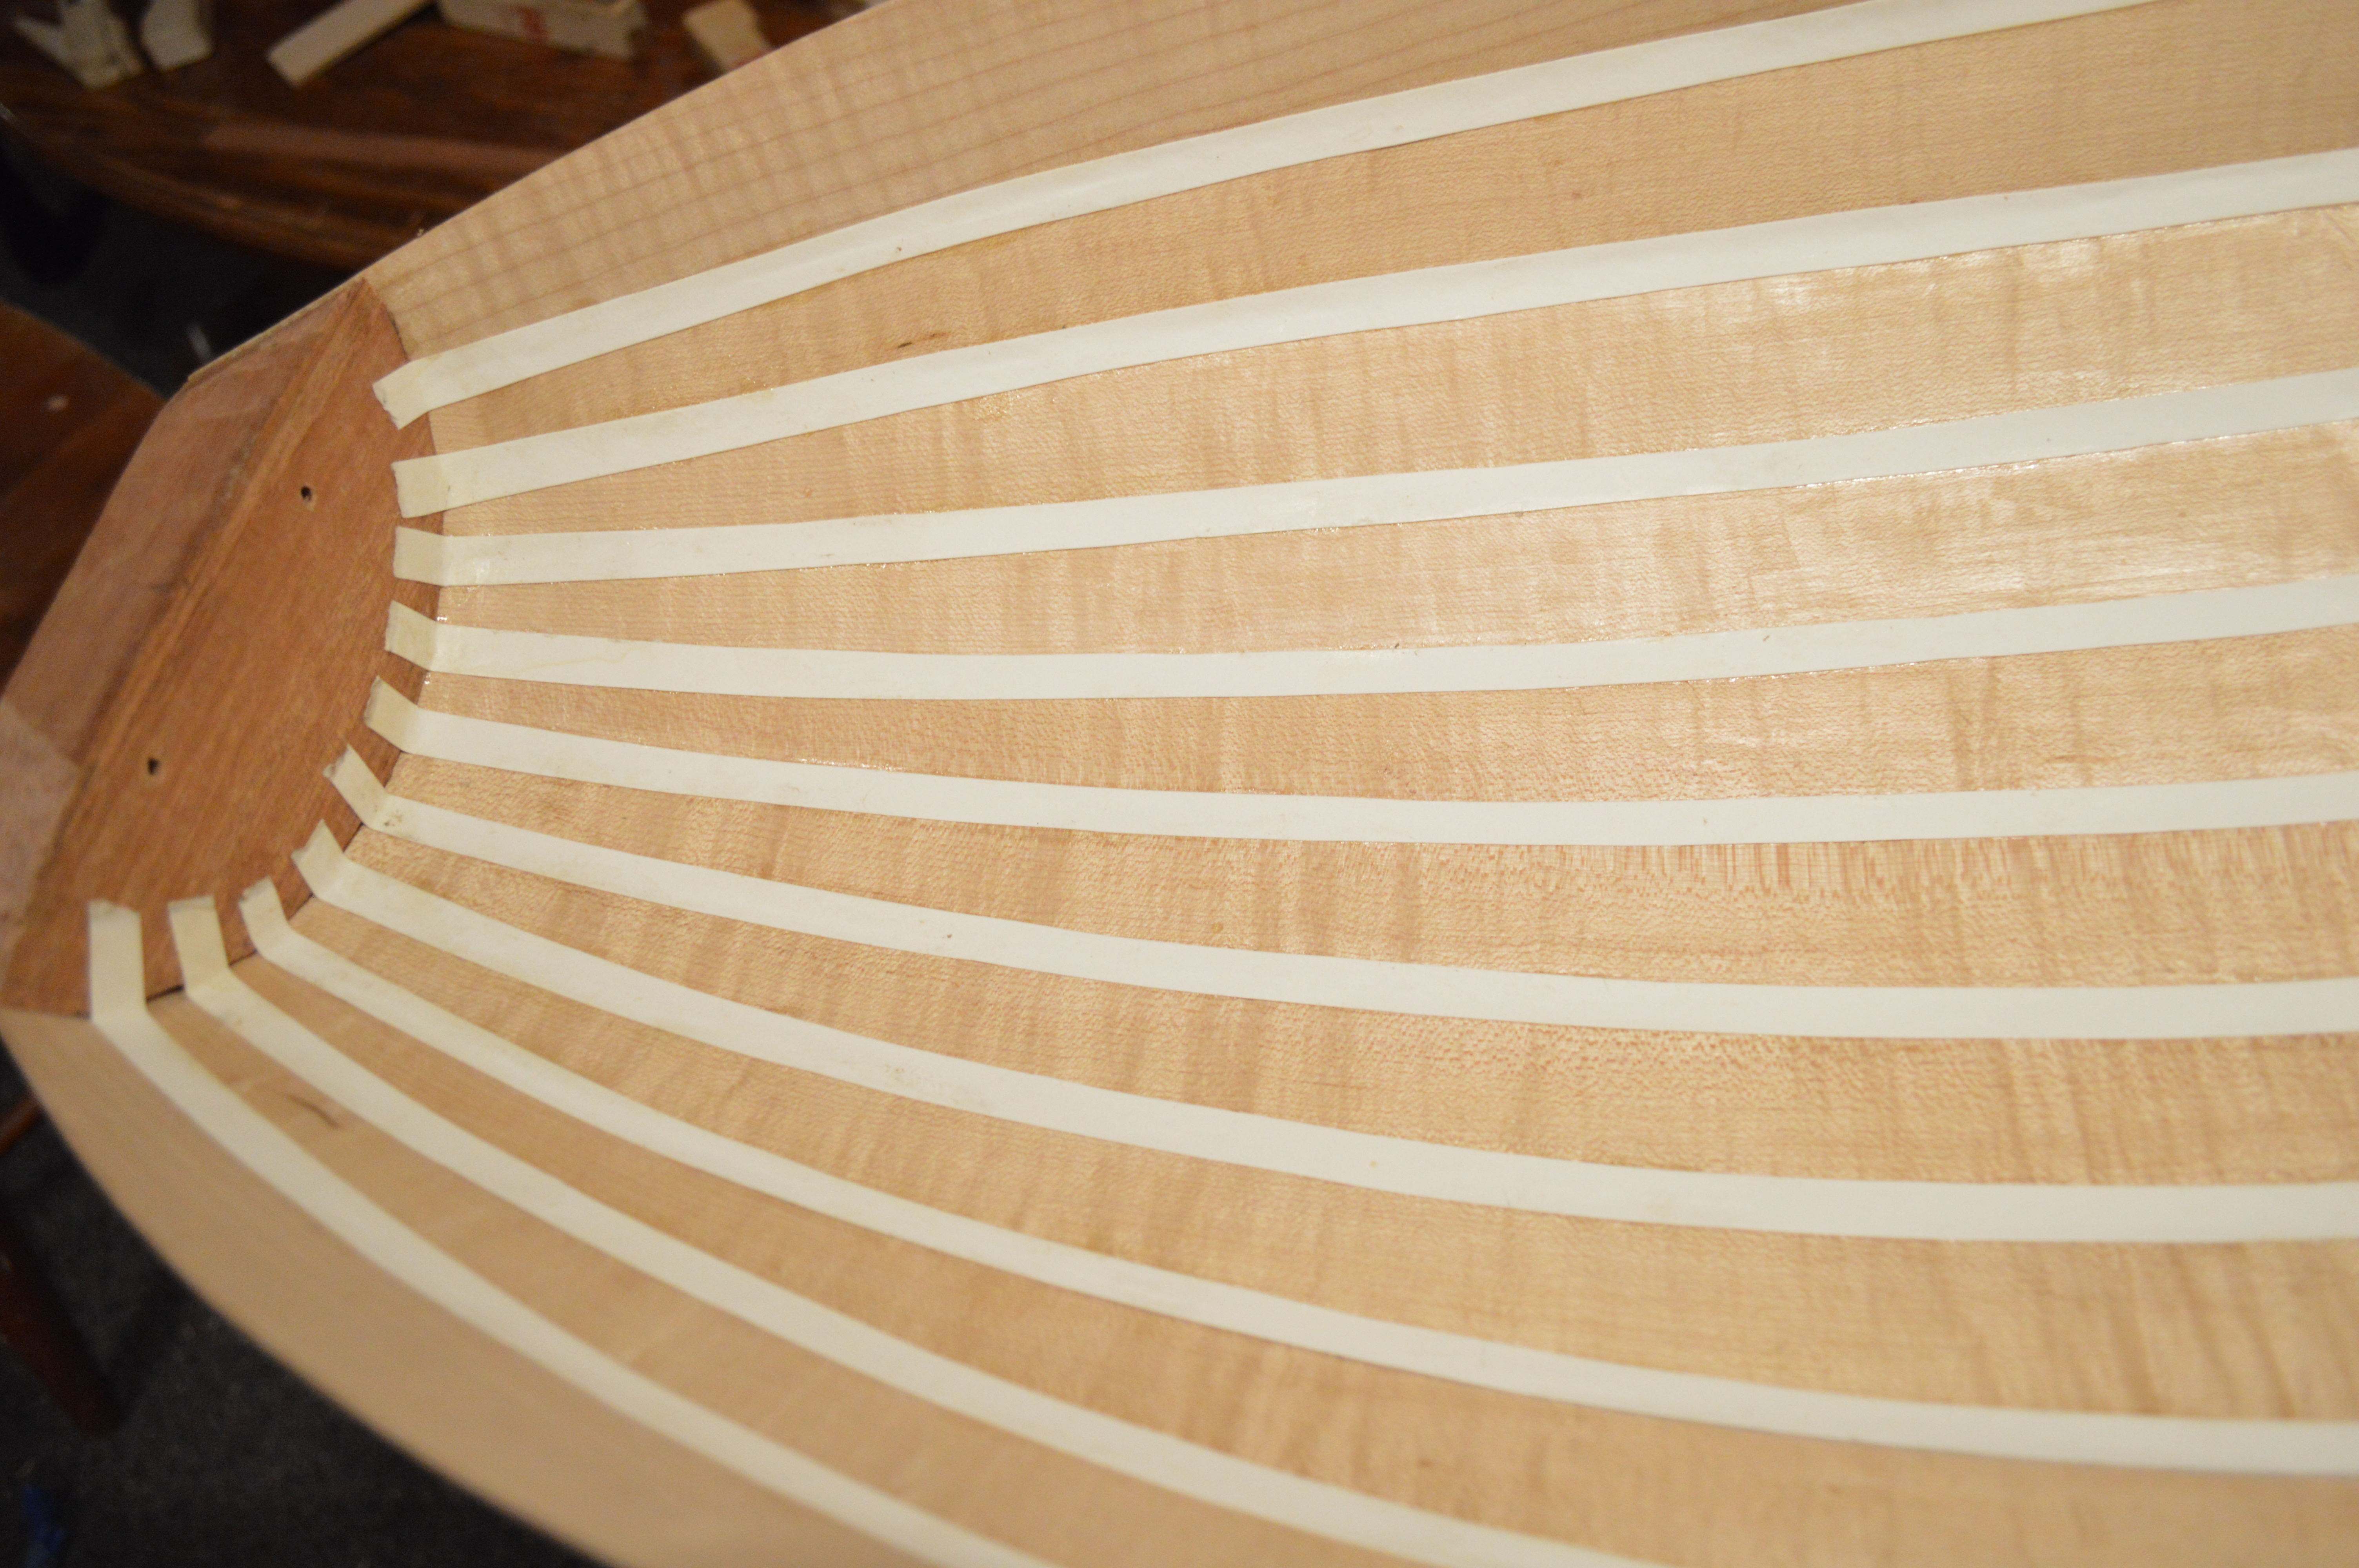
Here is the bowl pretty much finished. I will double check the surface for glue residue before continuing. The counter cap of spruce will be glued on the inside bottom of the bowl for extra support. I think the inside view of the bowl with the paper glued in-between ribs is one of my favorite aspects of lute building. I really like the pattern and contrast it creates.

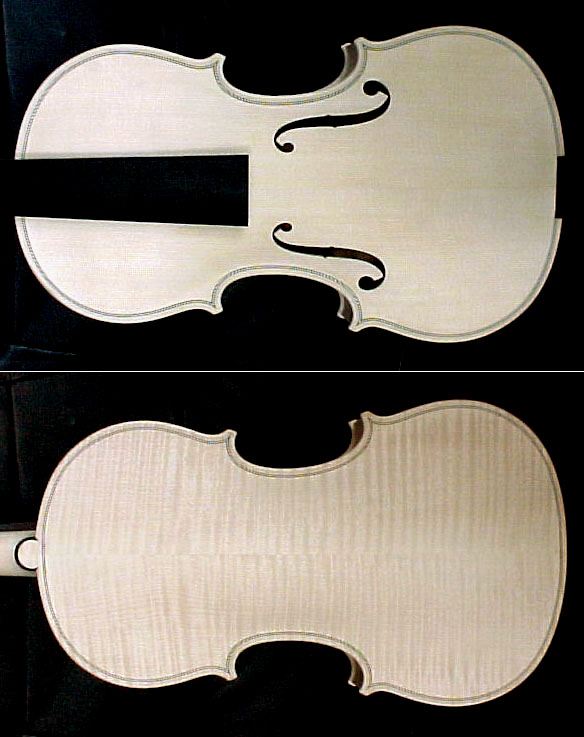
I am working on the right pigment for coloring the maple wood bowl on the 13-course lute. The top picture is the difference between the natural blonde color of maple and what it looks like after pigment is applied. Most luthiers color their instruments in the finishing stage. I posted a picture of a violin “in the white” below to show what a violin looks like before being finished and deepened with color. Notice how the sample that I colored above has a much more distinct curly pattern. These are both from the same piece of wood. Some recipes for violin varnish require the addition of iron oxide to the varnish to make the deep red we so commonly see on these instruments. Iron oxide is part of the pigment that I put on the piece of maple pictured above. Iron oxide (also known as rust) can give a beautiful depth to a finished instrument.


Here is the beginning of the construction of an eleven ribbed lute bowl in maple. It begins life as a thin slat of wood that is carefully planed down and then bent to the shape of the wooden mould. The ribs are fitted one by one trimming and refining until all the edges meet cleanly for a fit that conforms to the shape of the mould and the rib next to it. The bowl has an ugly look now, very unrefined with glue on it and untrimmed edges on the front; that will all be cleaned up later.

I am using Adobe Illustrator to create rose patterns that are very precise and easy to scale. This is going to be a rose for the 13 course baroque lute after Magno Dieffopruchar I am currently working on. I took a classic rose pattern and slightly altered it. I used the functions within the program to make the pattern symmetrical.

Here is the bowl after a few coats of varnish. Yew is a very dense wood and doesn’t have the pores that hardwoods have; so finishing requires less coats. This is a homemade varnish that is all natural, which means NO chemicals. It is spirit based and applied with a french polish technique. After there are enough coats of varnish, the surface is polished to a luster with pumice.
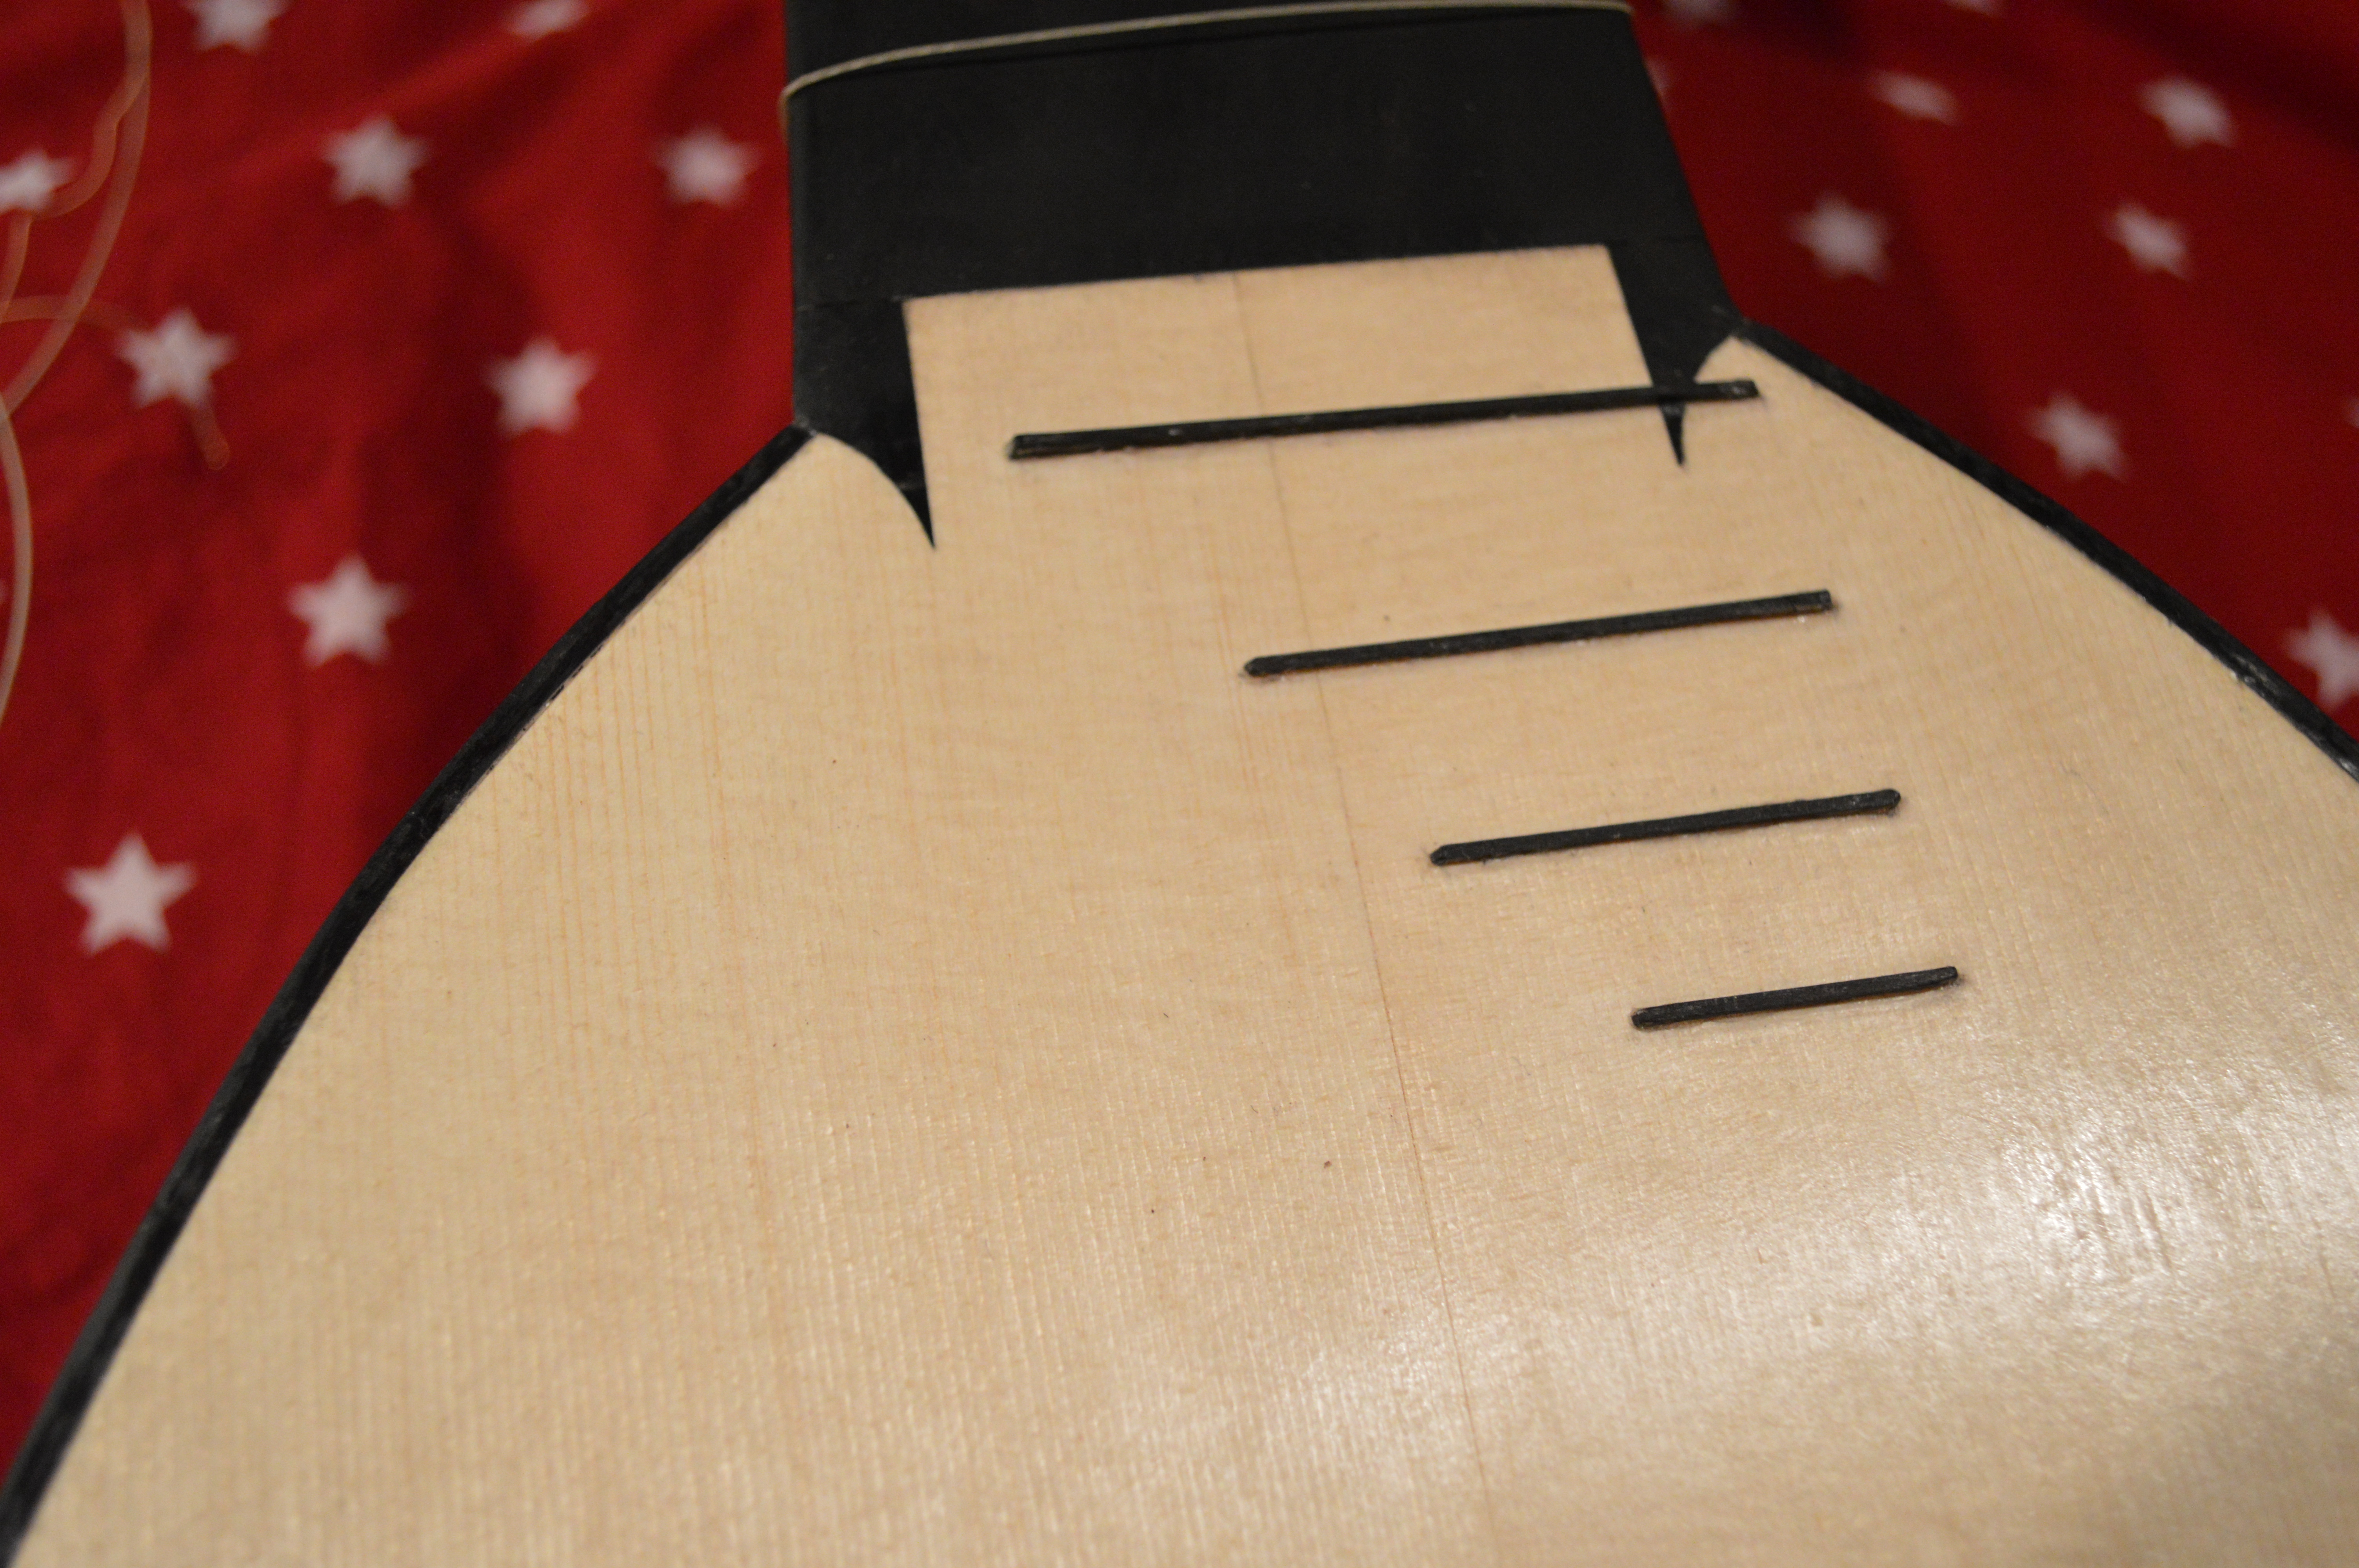
I measured out the placement for the 9th through 12th frets on the belly of the lute. These are made from ebony and planed down to about 1 mm thickness. First they are glued on and then I applied a few coats of wax for protection on the spruce belly. It is tricky to keep the spruce clean from any ebony dust contamination. A sharp scraper helps to keep dust to a minimum.
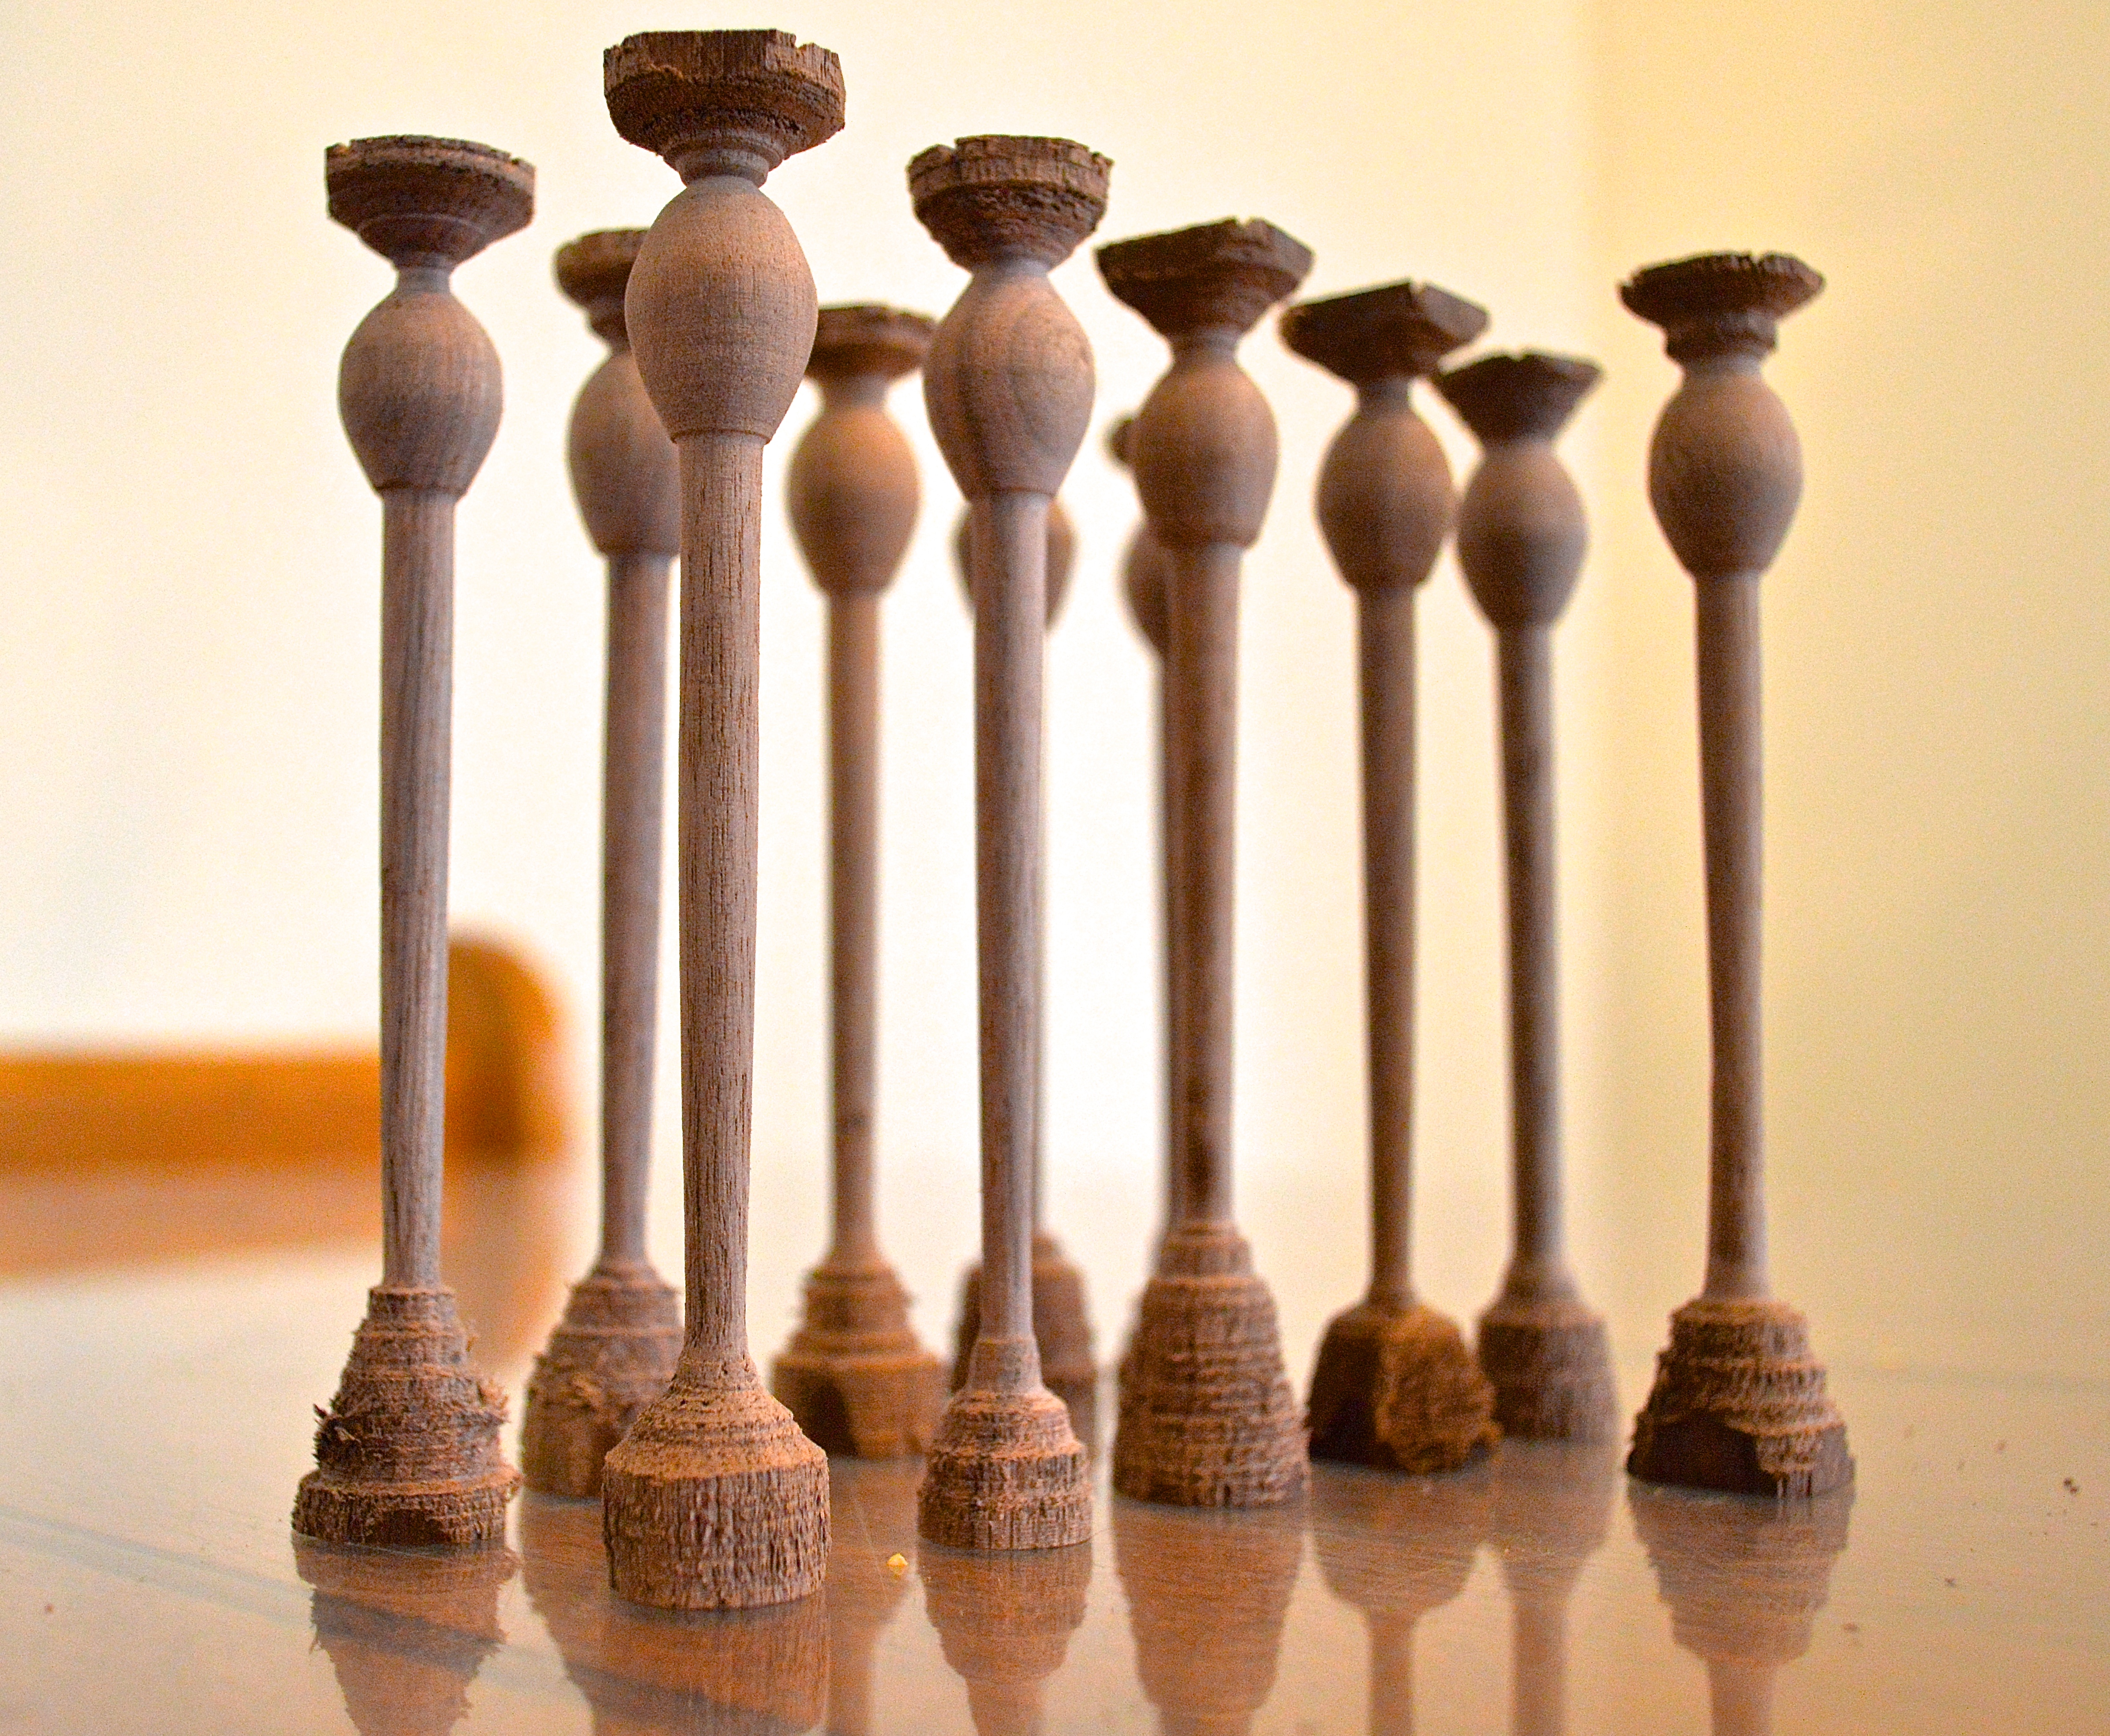
These lute pegs are made of walnut. The key to turning something on a lathe with a small diameter is to use wood with a straight grain. These pegs would have broke before they reached this size if I used wood without a straight grain.
Burnished rib on left (one with reflection)
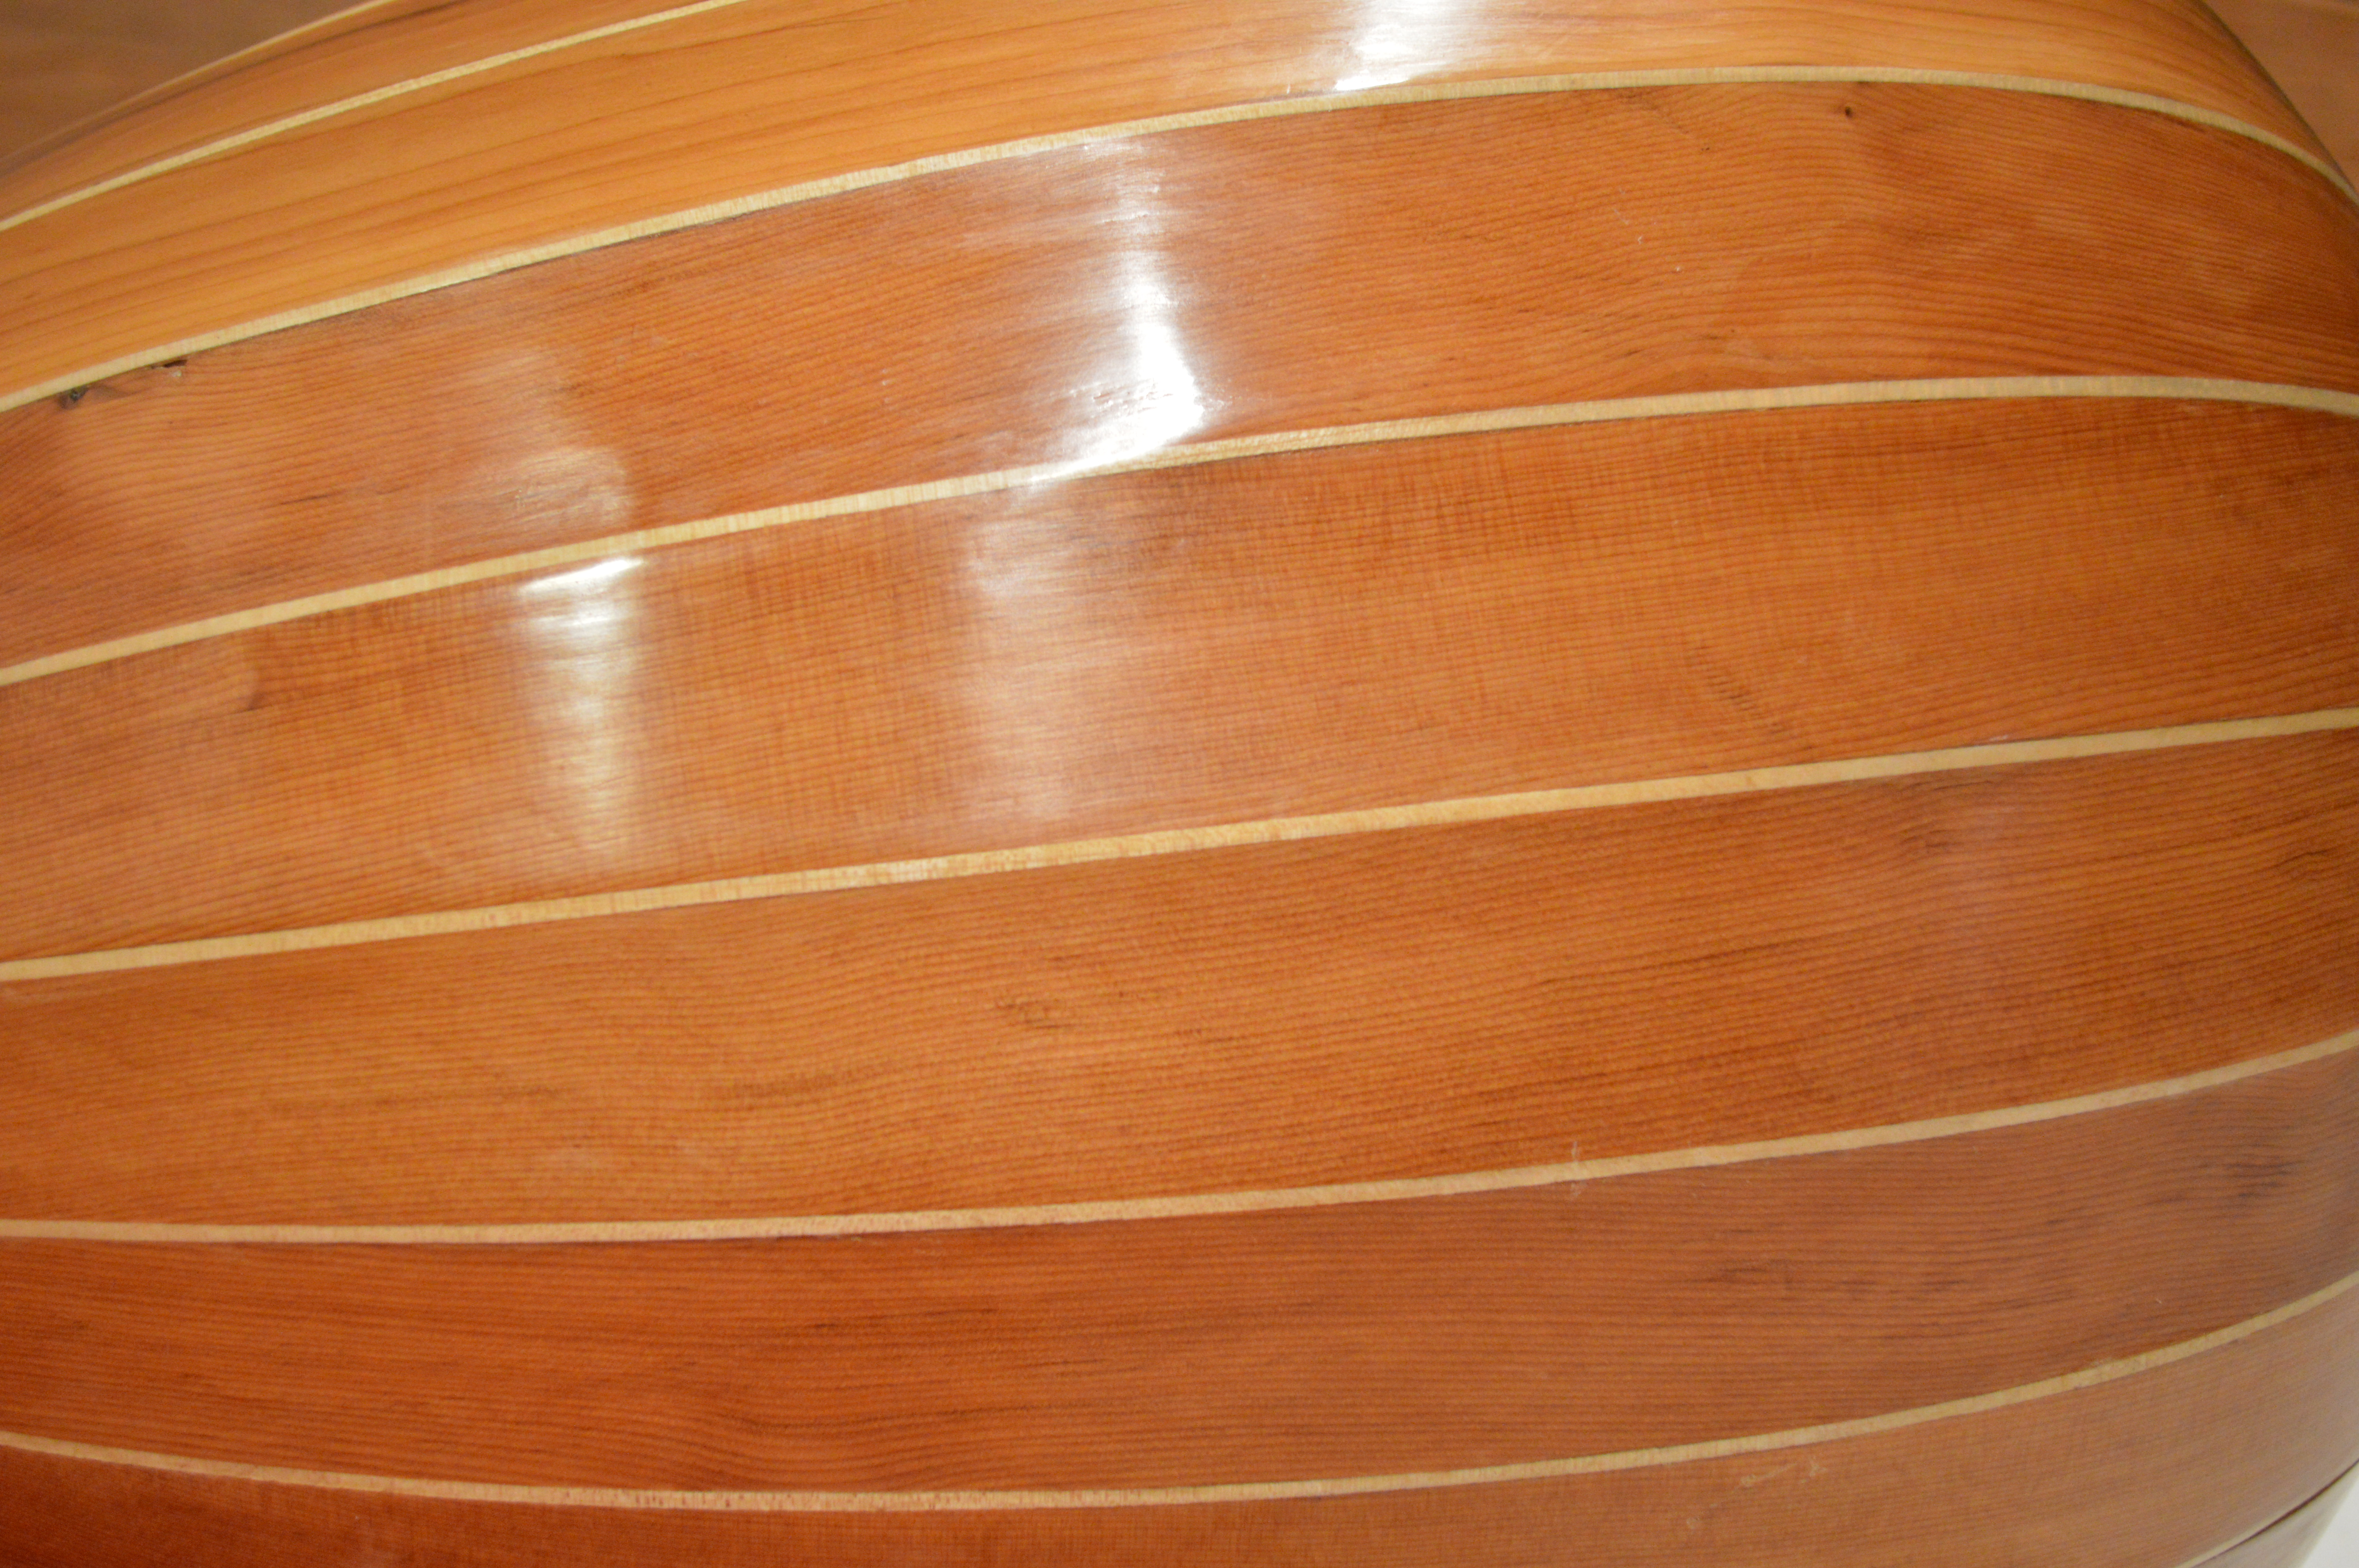
I have begun to prepare the bowl for varnishing. After scraping all the residual hide glue from joining the ribs, any irregular areas are sanded smooth. I burnish the wood with a very hard and smooth stone before applying any varnish. I show an example of what a burnished vs. non burnished rib looks like in the photo. The wood is pacific yew and it is very dense. It burnishes to a nice luster pretty quick.


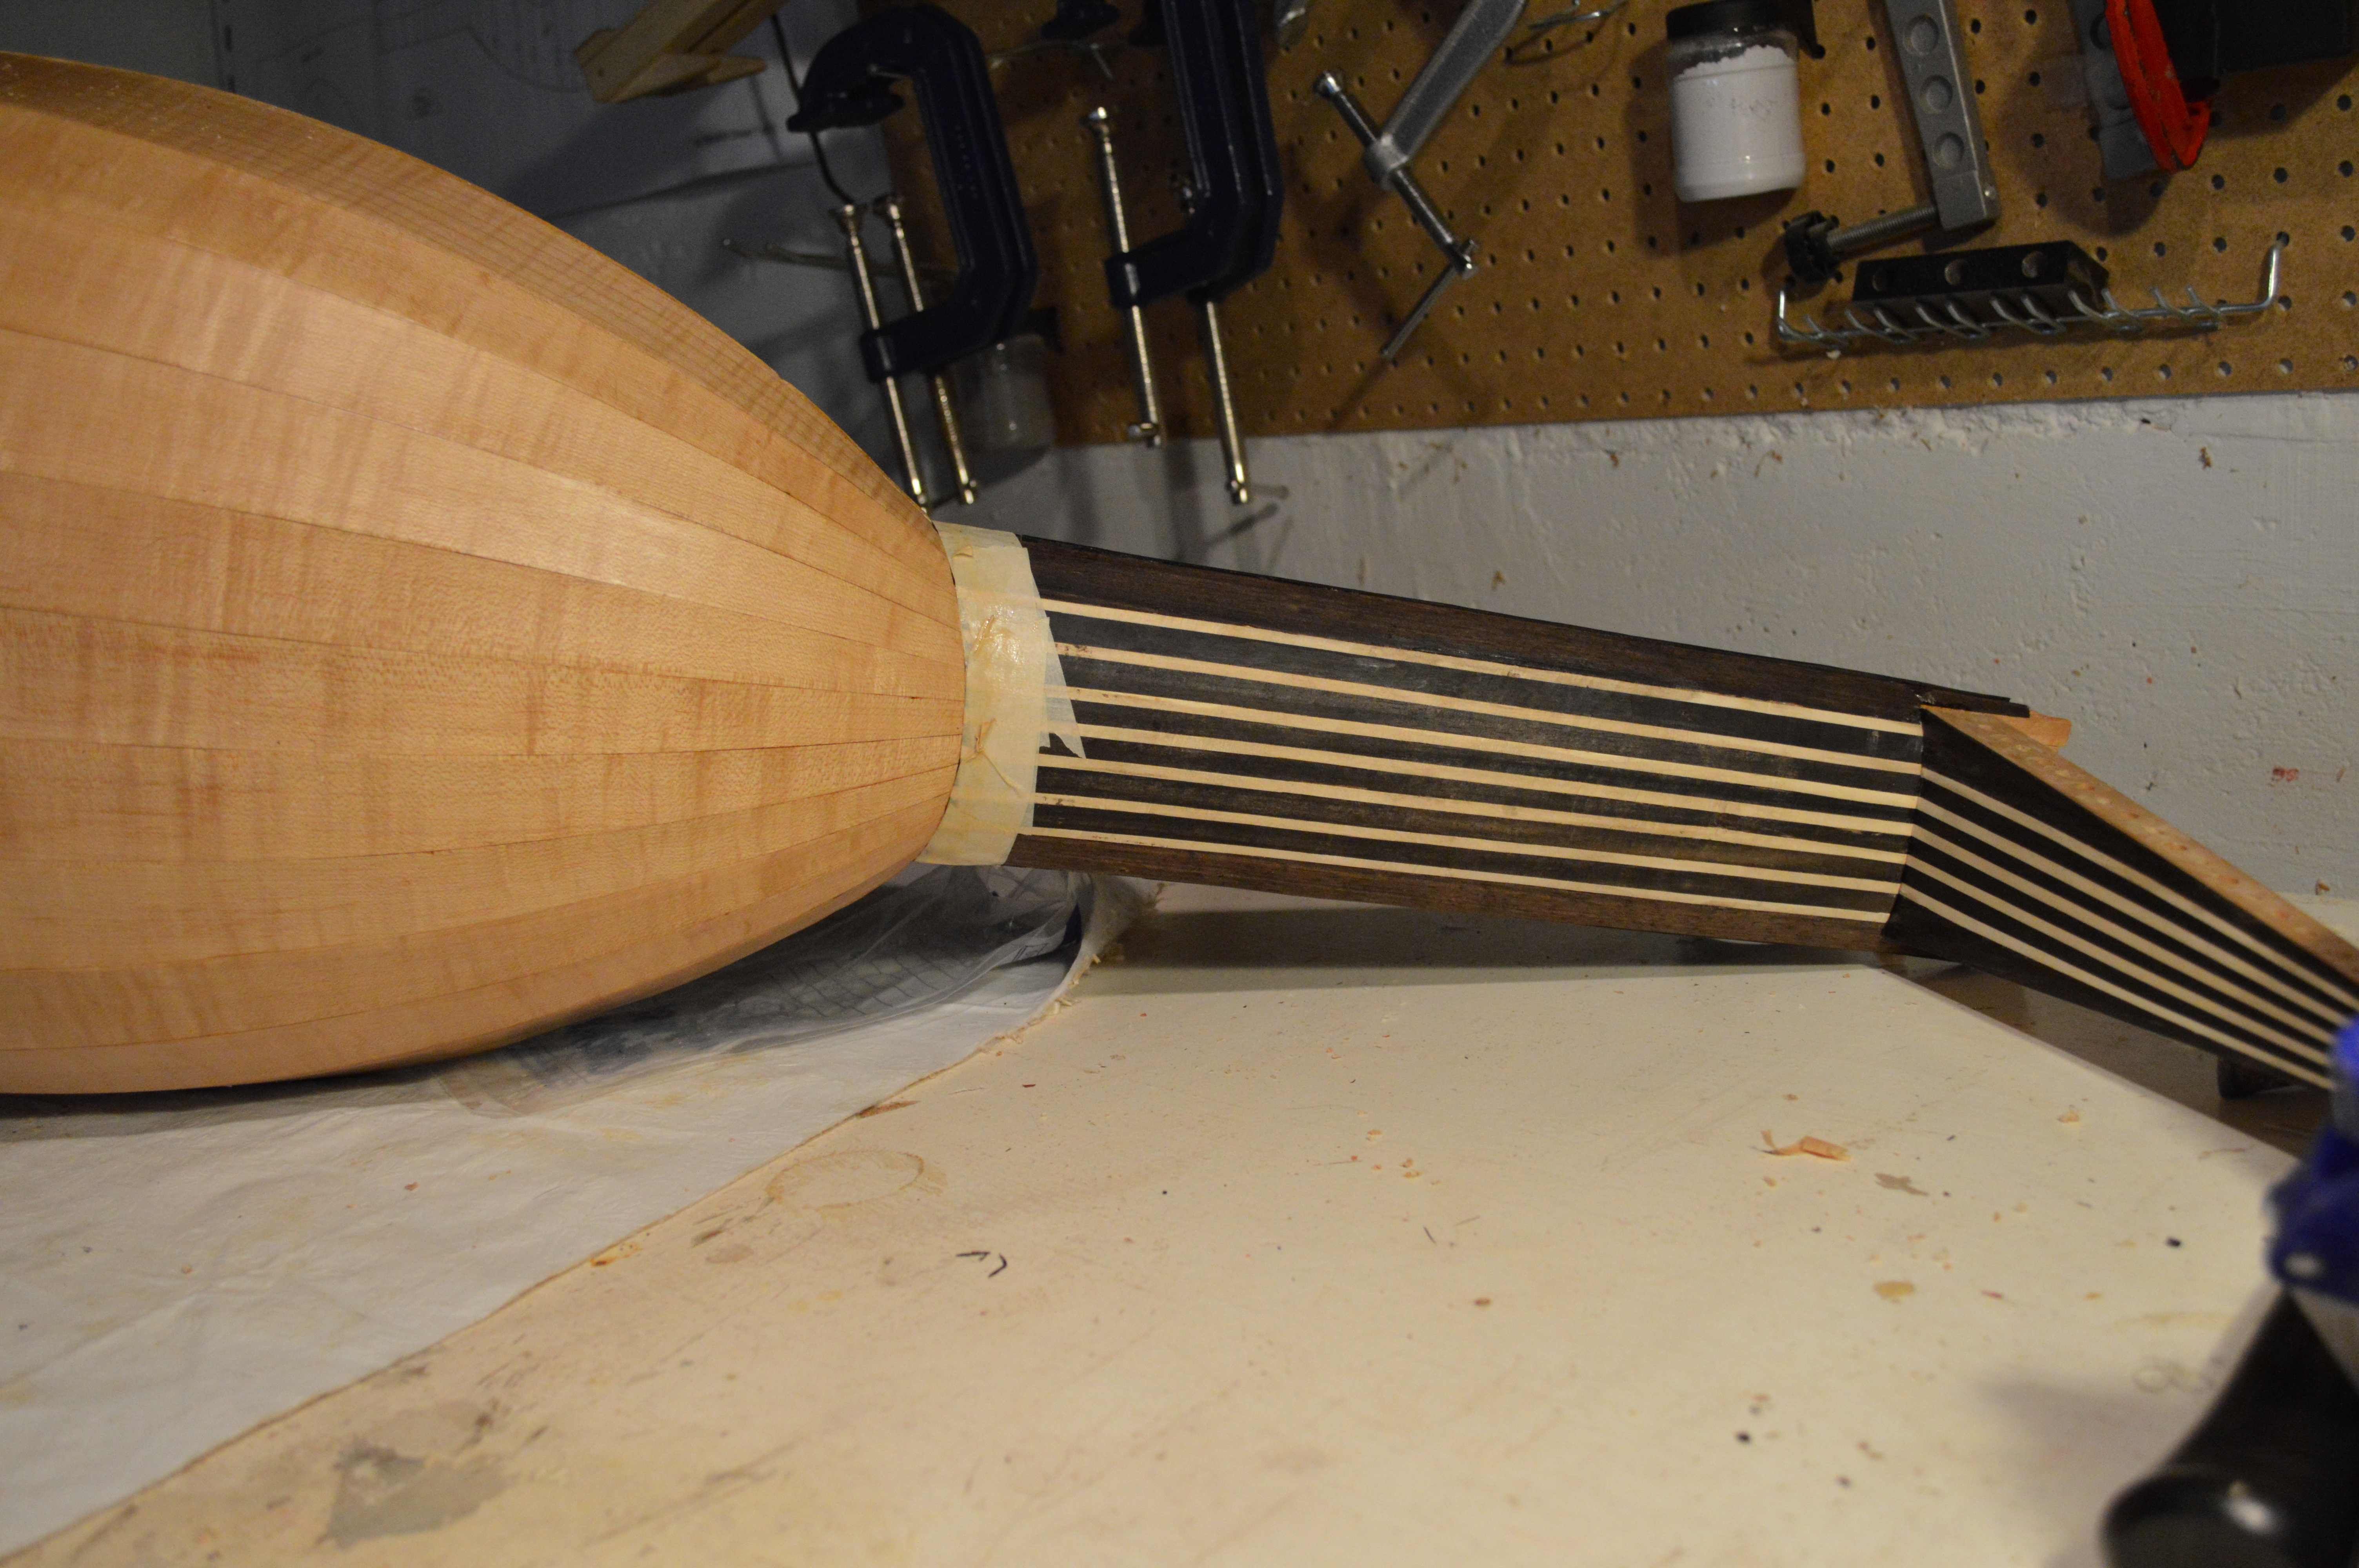
The neck is first shaped, then a thin layer of hardwood is veneered over it. I continued the design into the bottom of the pegbox shown in the last picture. I used cocobolo, ebony and holly for the stripes. The pegbox is still separate from the neck; I will drill, ream and fit all the tuning pegs into the pegbox before gluing these parts together.

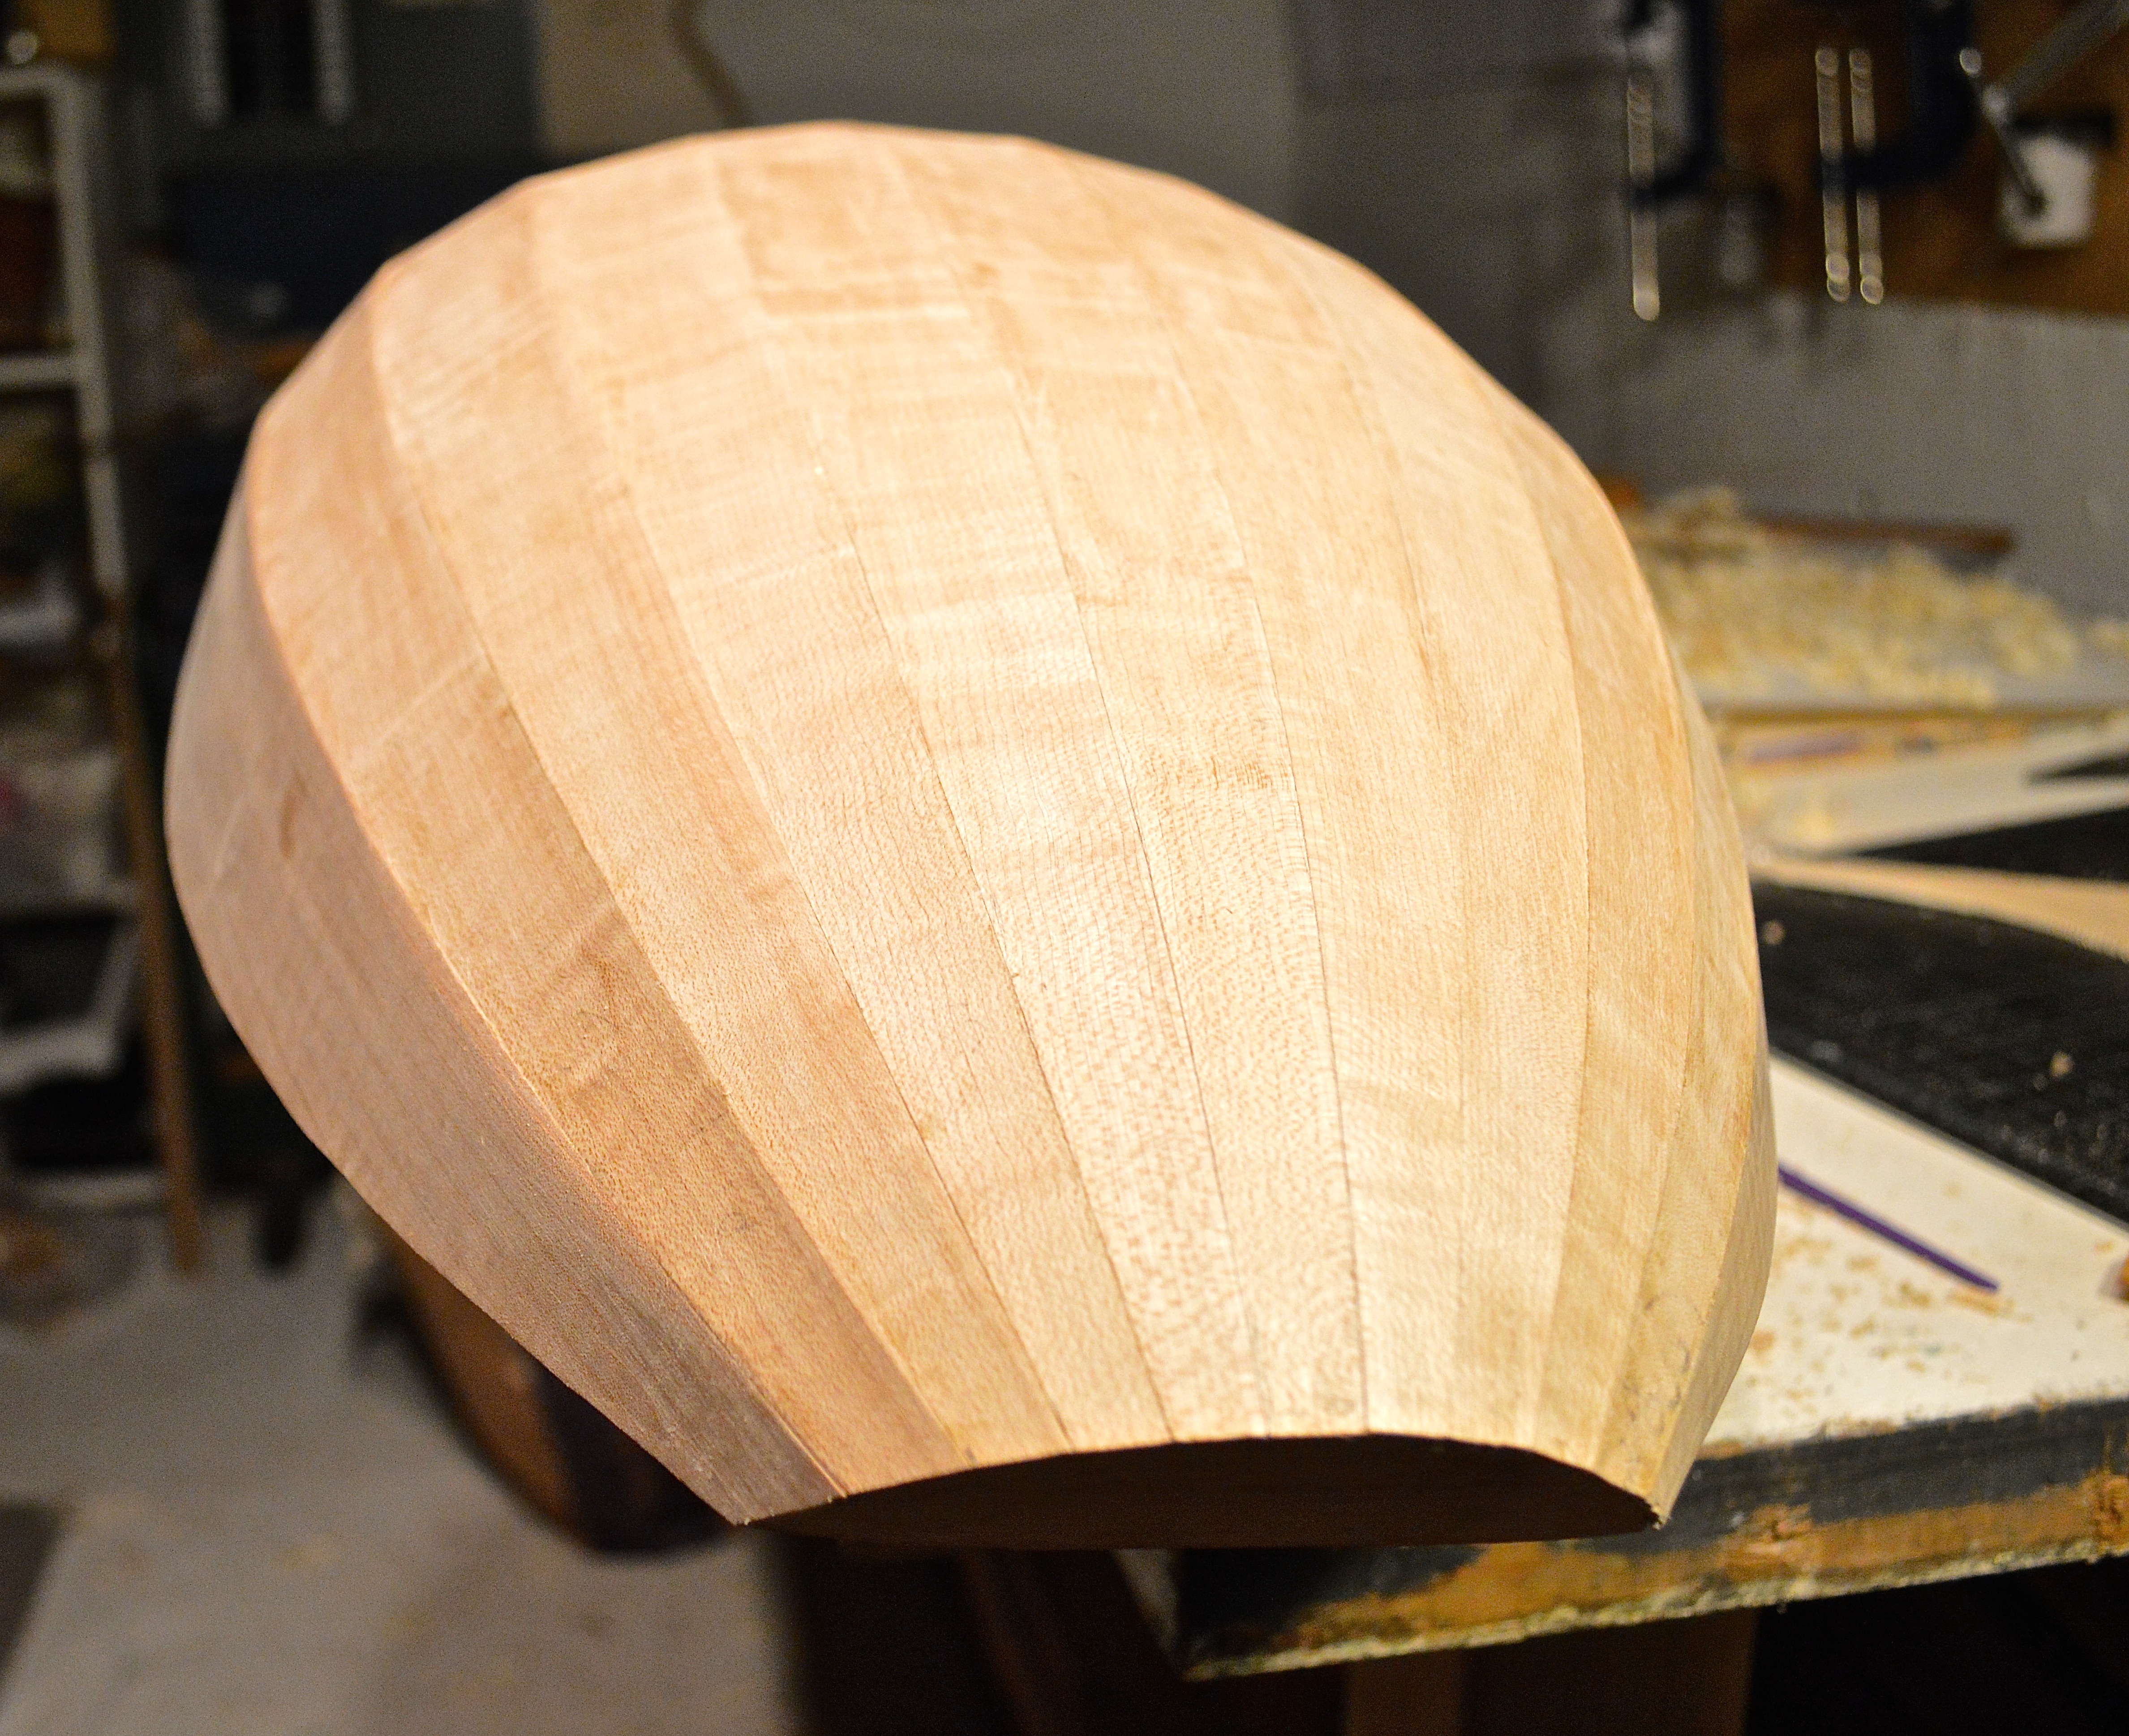
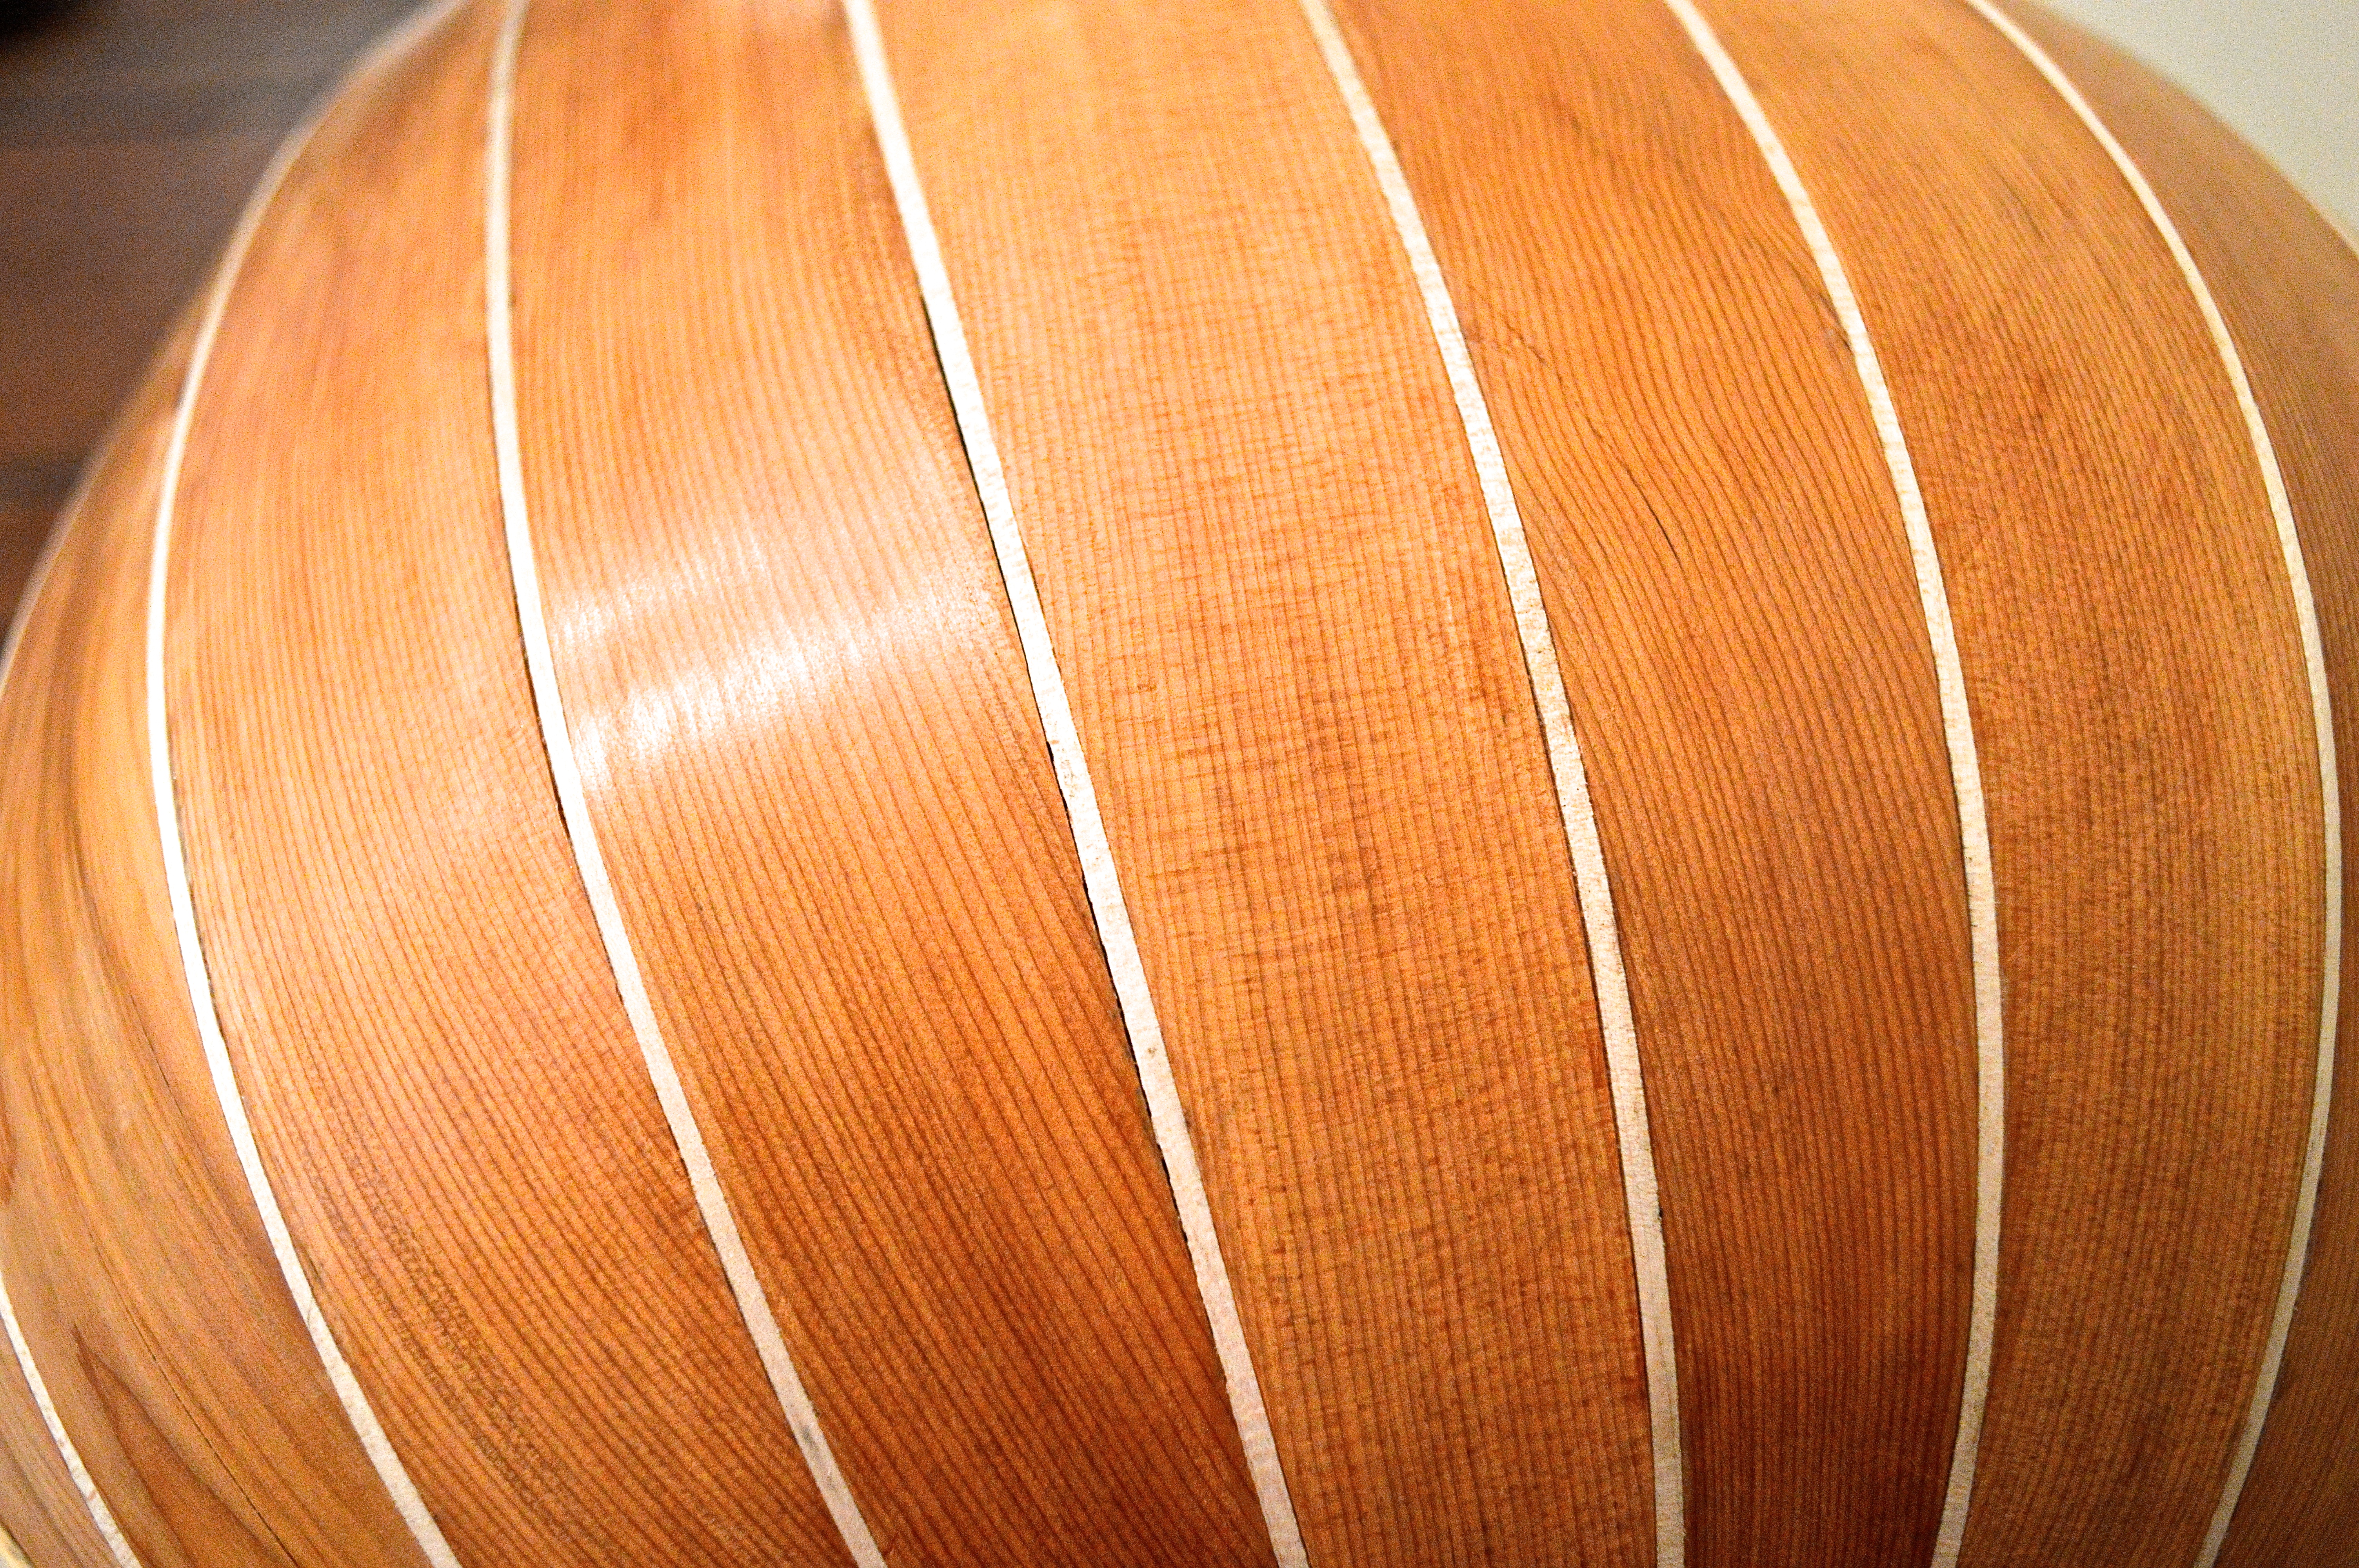
The bowl is constructed on a solid wooden form and it looks like this on the inside when it first comes off the mold.

Next you attach hand-made paper between each joint so that it stays together!

The masking tape shown here is essential before the paper strips are glued on the inside. The green masking tape keeps the joints from splitting and ruining all of the work you put in! Shown at the bottom is a piece of wood connecting all the ribs together. This is called the cap, I chose a piece of yew with a good amount of sap wood for a nice look.
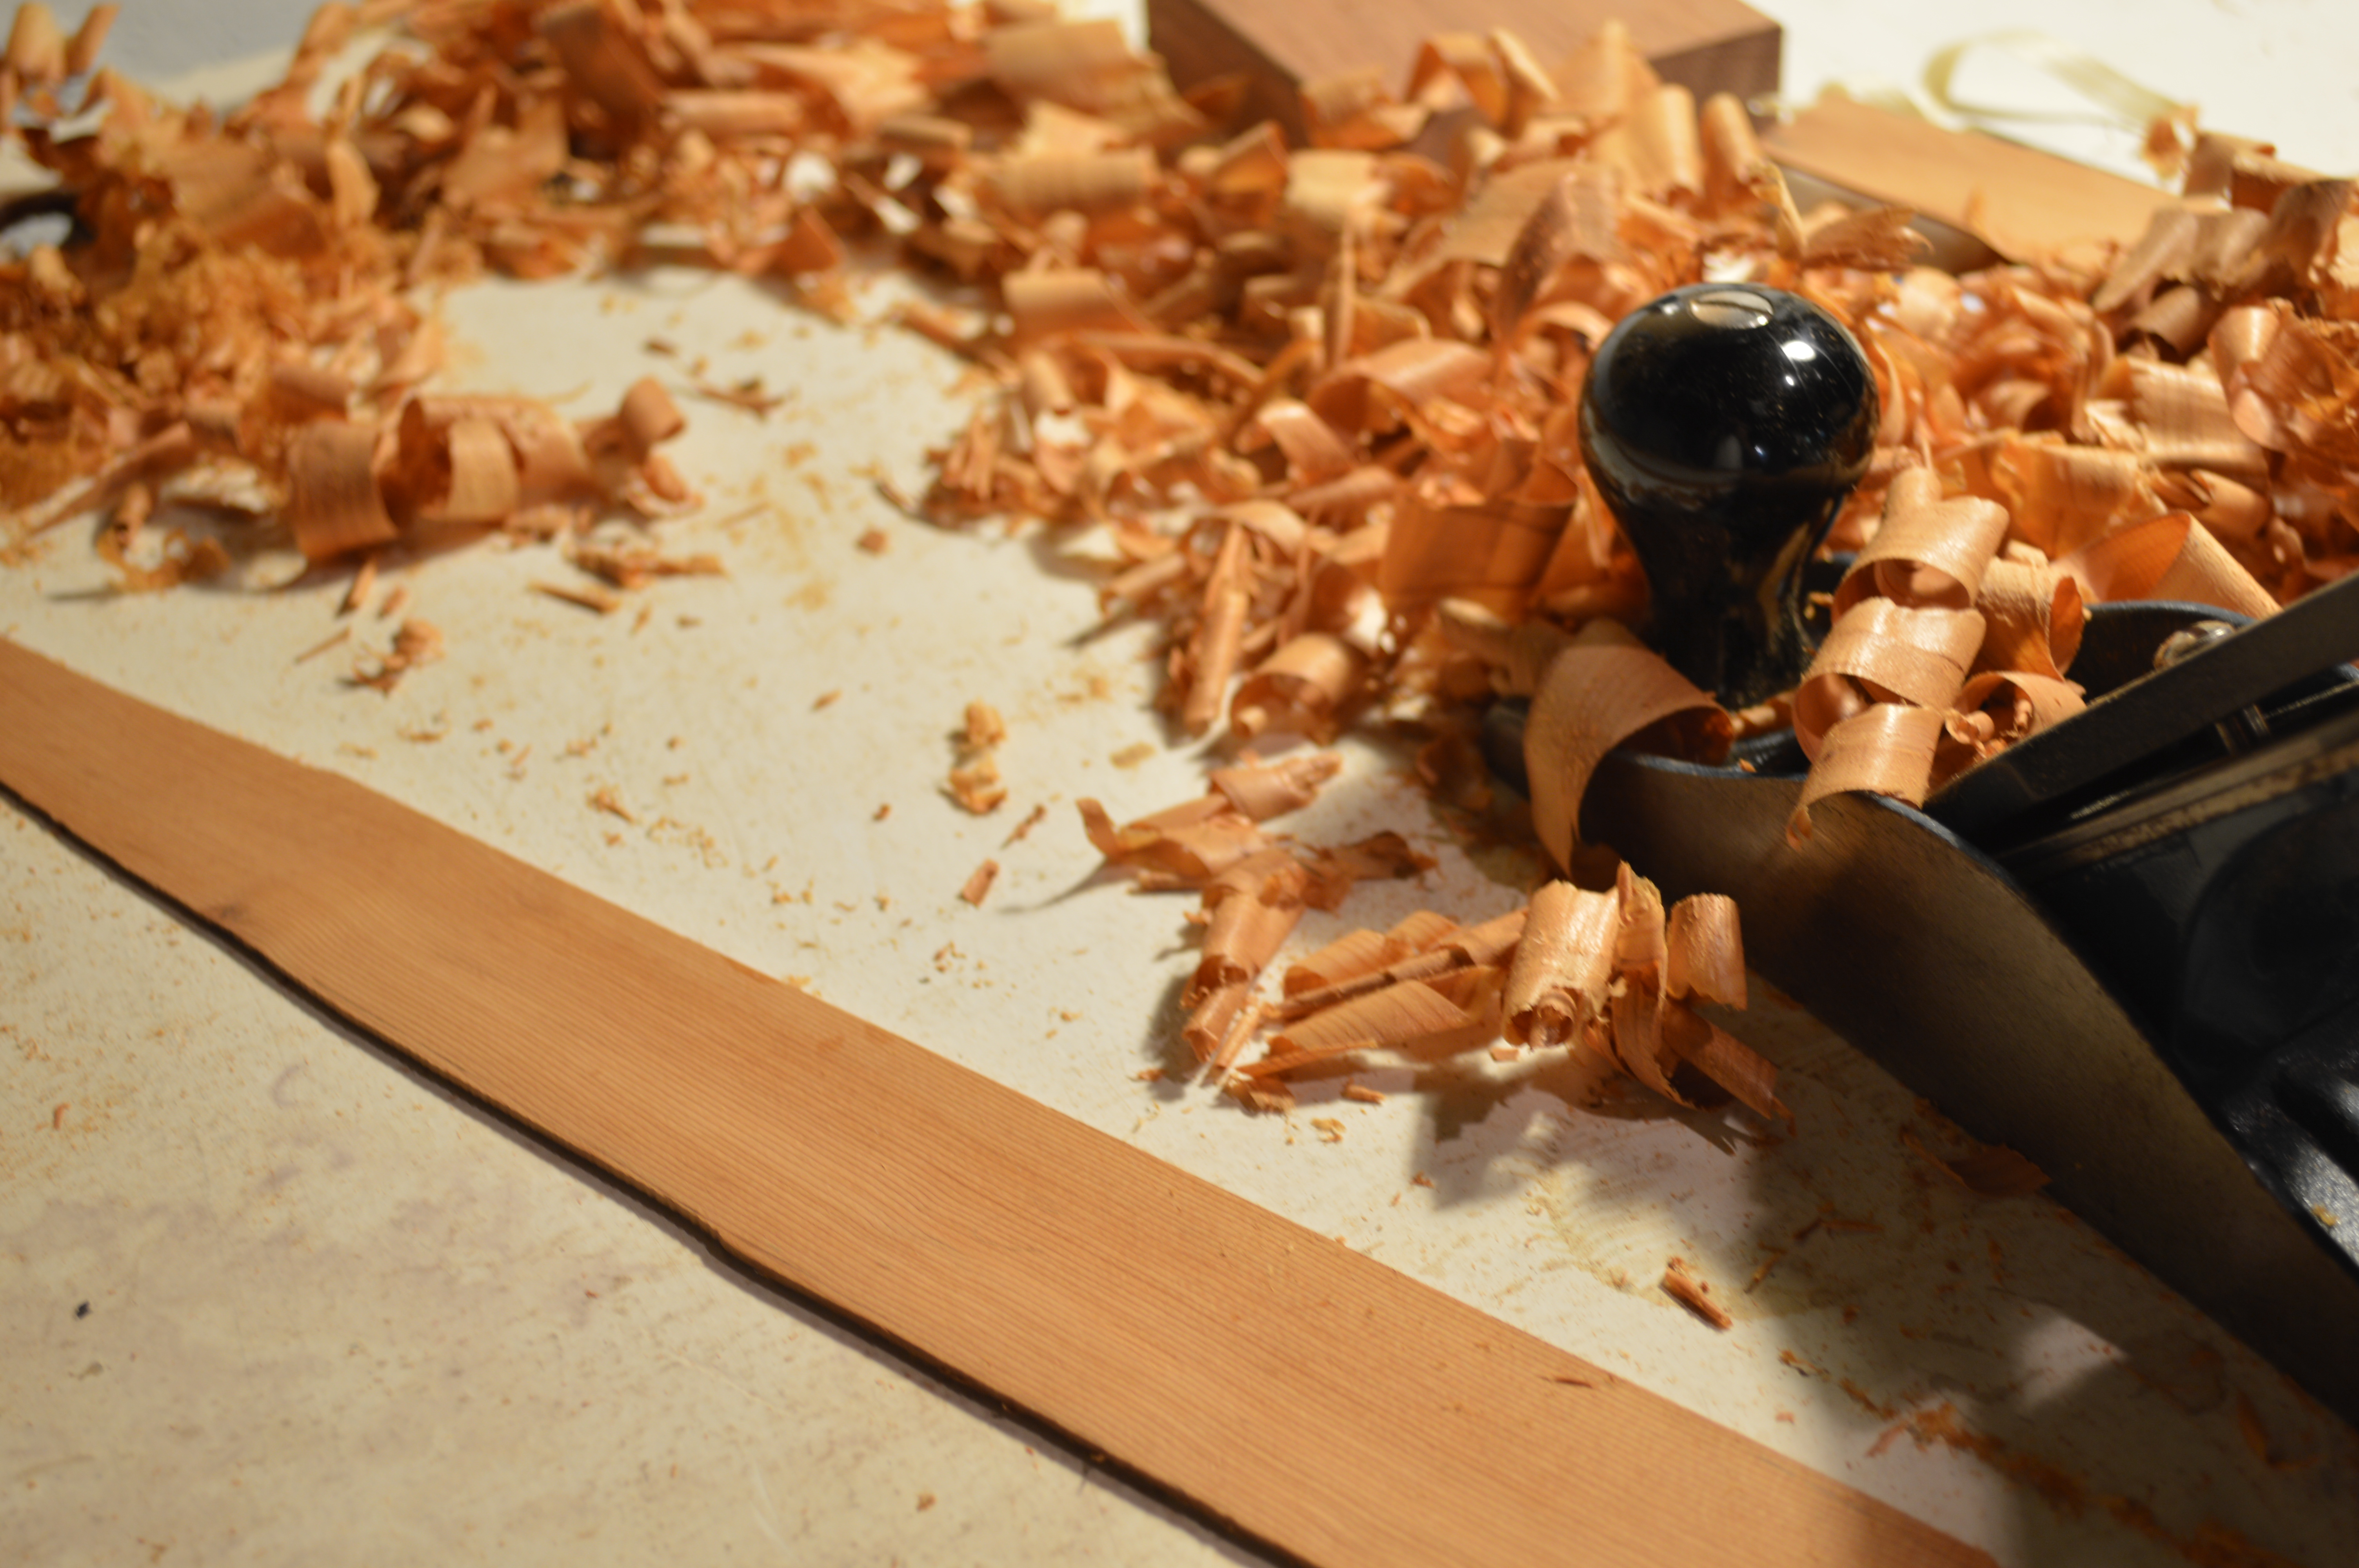
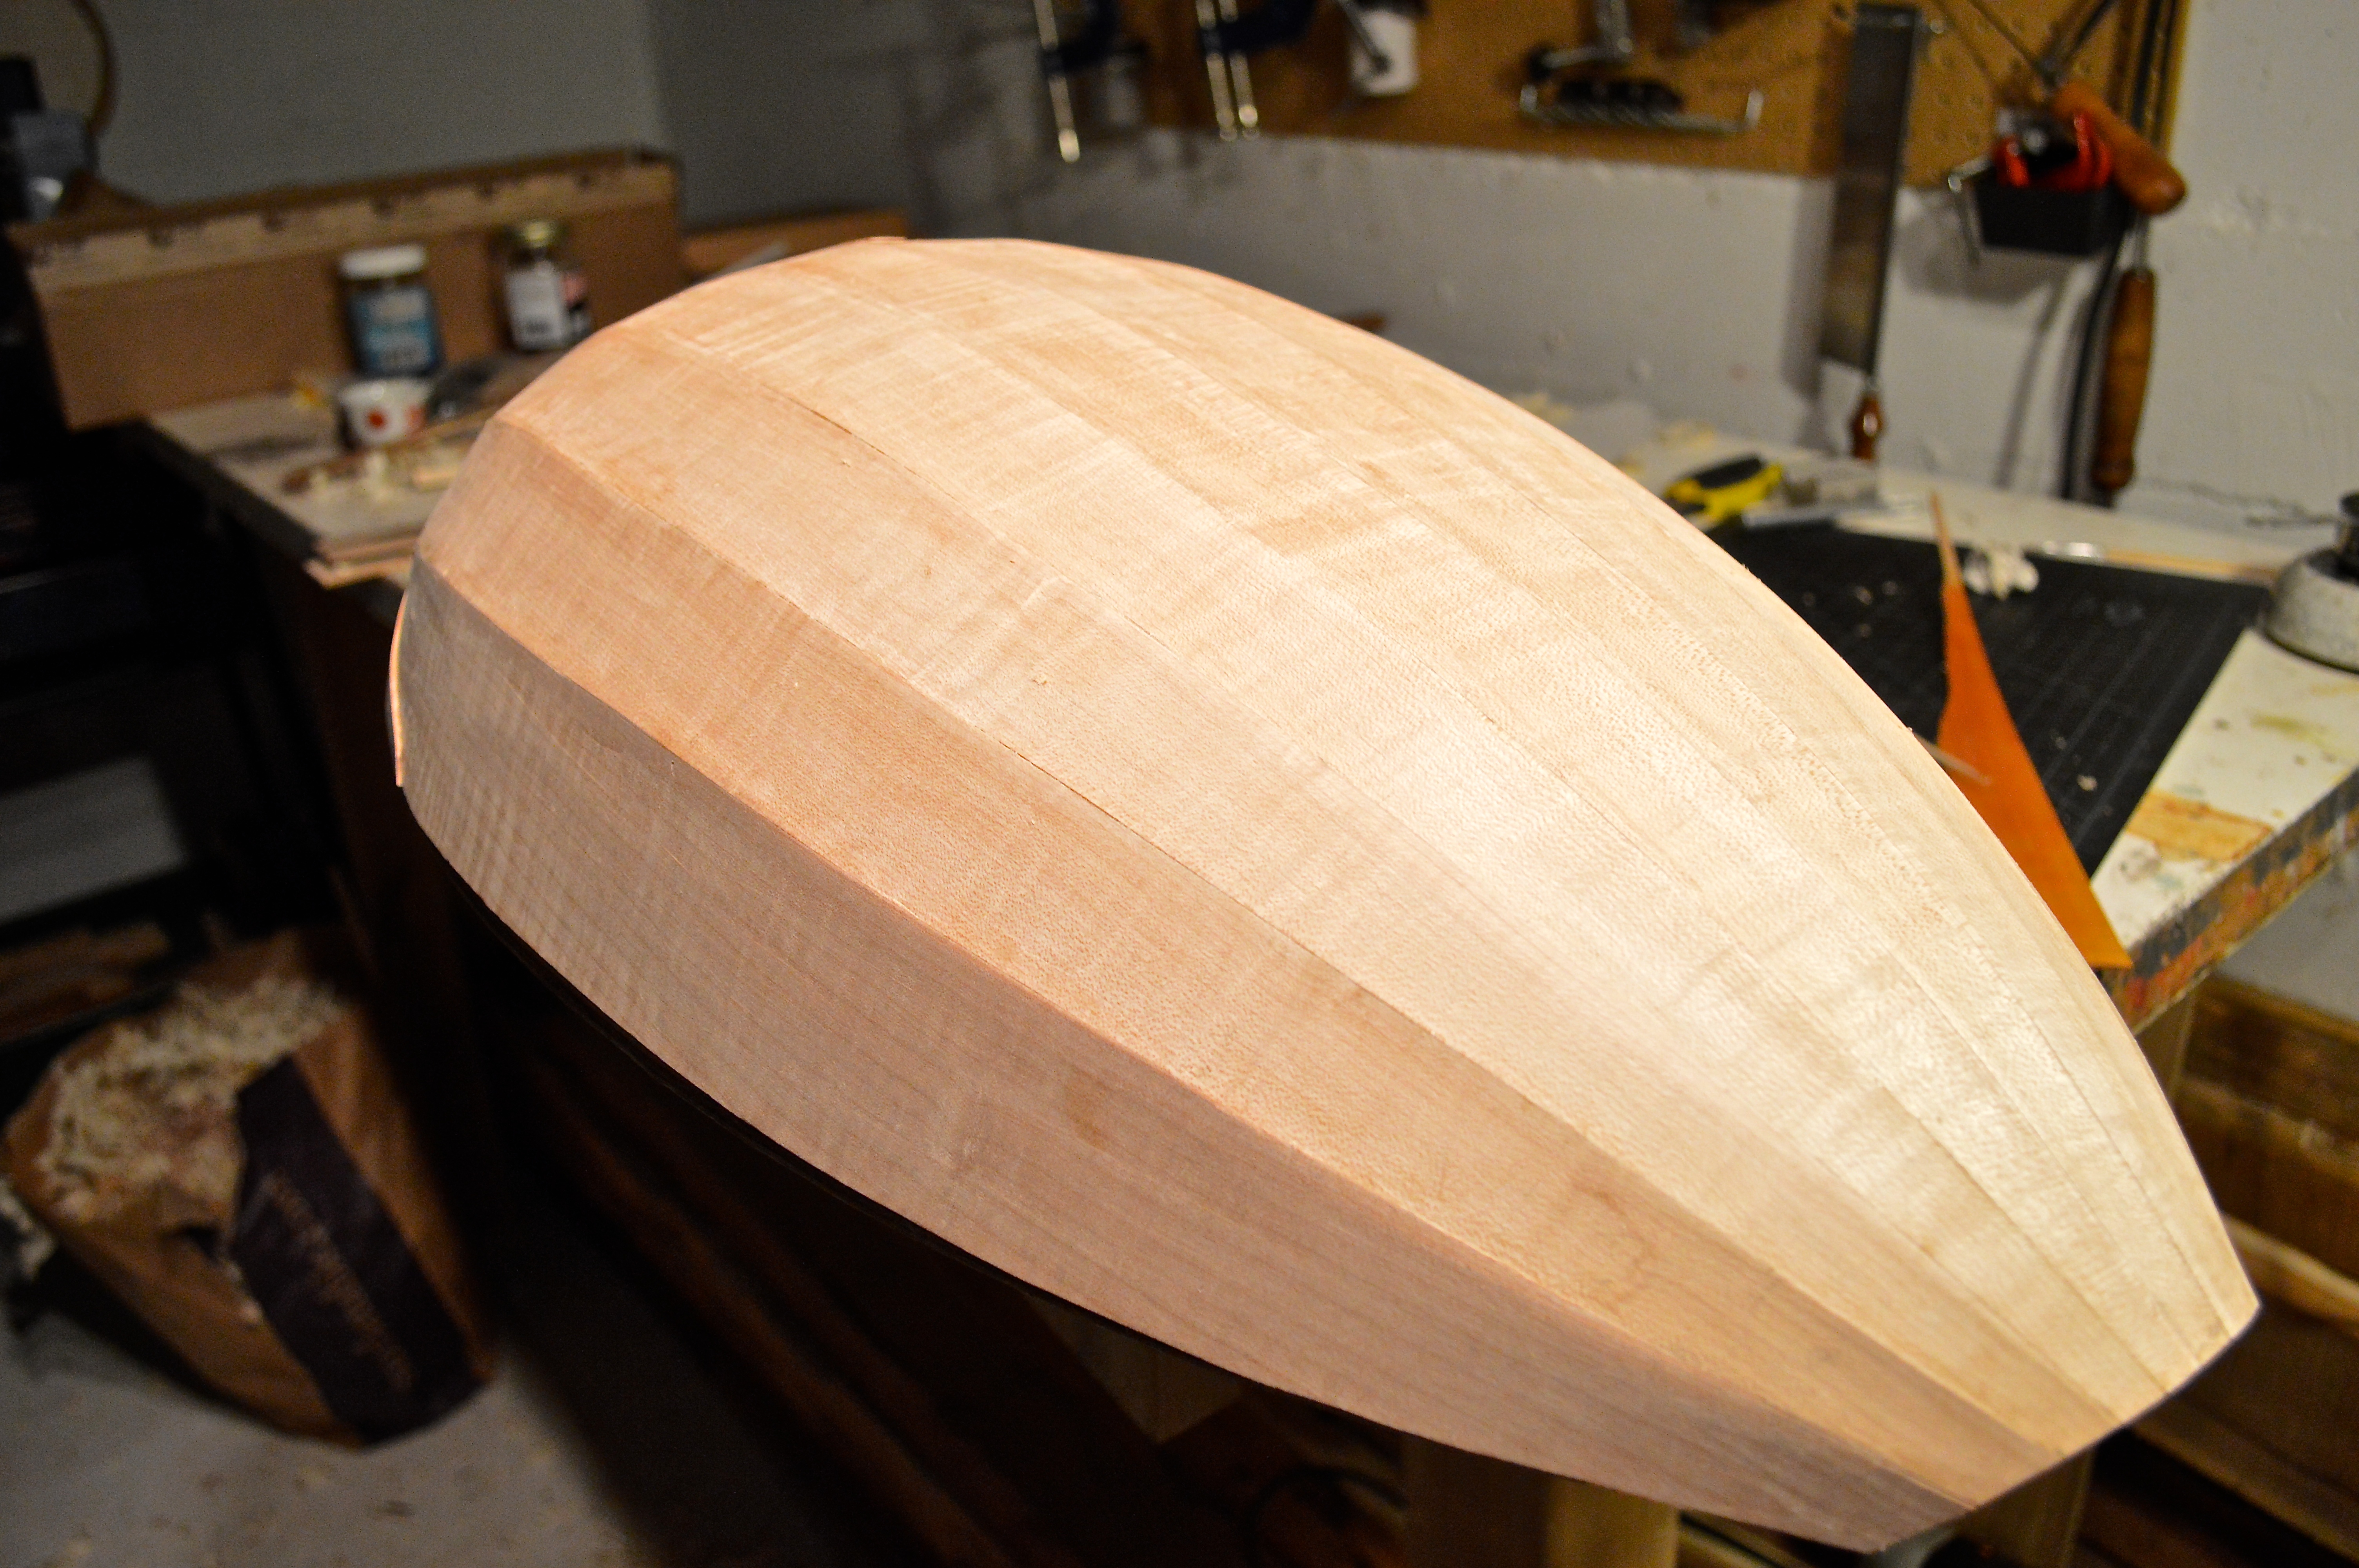
Here is the beginning of the construction of a lute bowl made of yew. This is one of the ribs that is being planed down to a specific thickness and cut to a rough outline according to the shape of the wooden mold.