
The renaissance lute bridge is a one piece, fully functional object. The Classical guitar bridge developed over time to have a slot cut into the top of it, and a bone “saddle” perfectly fitted into this slot. This was to aid adjustment to the height of the strings over the fretboard. A very complicated situation at first glance, but once you understand the rules and where you want to end up with your string height; it is not that difficult. You must build the lute bridge with all of this information already known, because of the difficulty in adjusting the string height on the bridge. The lute bridge design is very small and light to aid in the quick response of the instrument and to minimize unwanted sustain. The bridge I made here is constructed from swiss pear. After it is finished I coat it with a black stain and varnish over the stain to seal it. Below the finished bridge is the blank of swiss pear that it was made from.
Uncategorized
Finishing of the rose for the 7-course renaissance lute
Uncategorized Here is the rose after all the cutting and carving is completed. Cutting out the design from the inside and carving the detail from the outside. I left this design without a border for a cleaner look. After the carving is finished, a light coat of varnish is applied to protect and seal the wood. Tiny support braces are glued to the underside, they are stained black so they do not distract from the rose itself.
Beginning of lute rose
Uncategorized
This is the preliminary cut from the back to the front. A paper pattern is glued on the back of the spruce and a very sharp knife is used to cut out the pattern. This is a piece of Engelmann spruce that I have already planed down to a specific thickness. It is less than 2 mm in thickness and the part where the rose is cut has been reduced to about 1 mm.
rebuilding a previous guitar
Uncategorized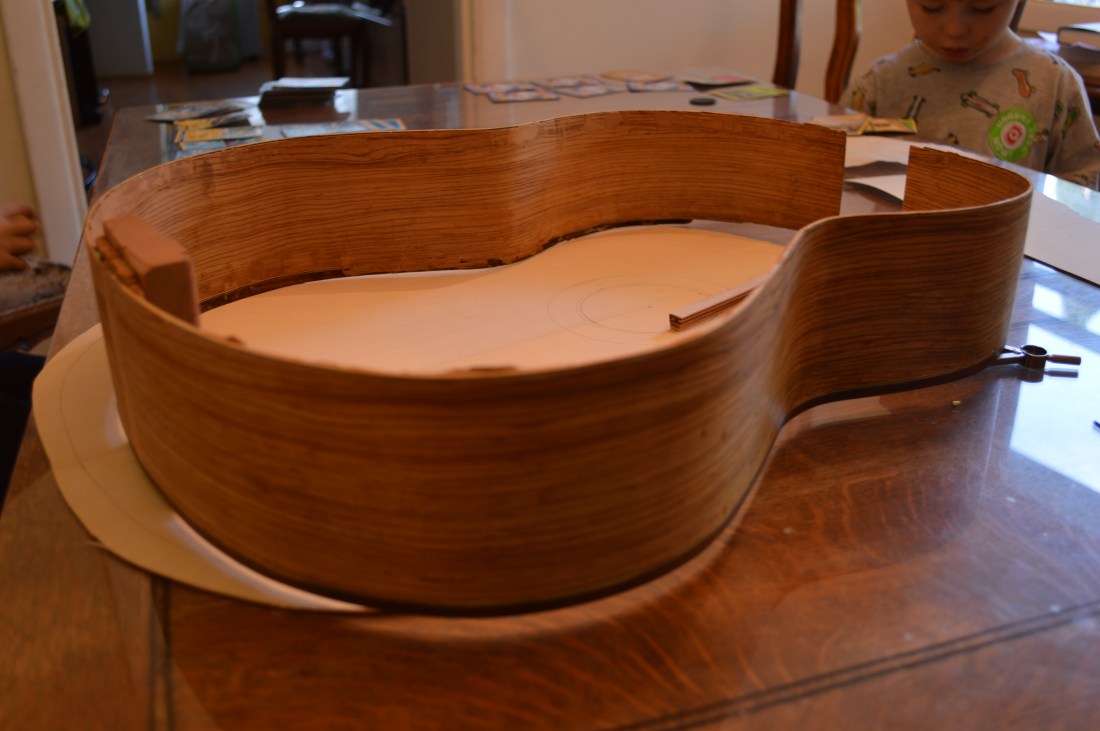
Here are the sides from the old guitar with a new European spruce soundboard. I will re-use most of the parts from the old guitar but, the top splintered upon removal and ended up unusable. The back and sides are a Mexican Rosewood known as Palo Escrito.
